|
Dreamy Picture
Hi Friends
I have a very interesting and beautiful photoshop tutorial that is dream picture concept and so excited to share it with you all; I have a beautiful child and tried to explain desire in the sky. I have used a sky and child picture to make photo manipulate, you will learn about color adjustment, filter and blend option. I am sure you really like and enjoy this effect so let's start.
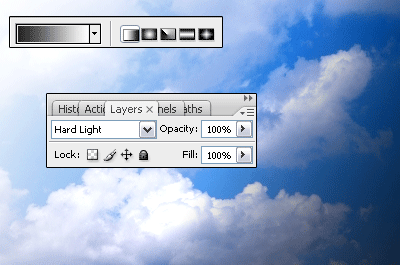
Take any picture to put in the background; I have selected a sky picture for that. Take a new layer and choose Gradient Tool (G key) and make settings in the optional bar then apply in the layer and change the layer blend mode "Normal" to "Hard light" as here.
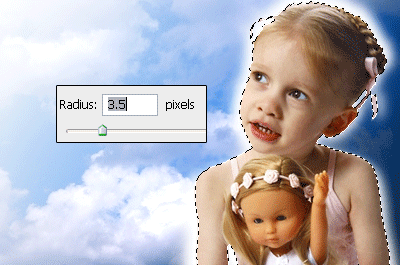
Select another picture as you make focus on; I have selected a beautiful child with doll. You have to make selection first to cut the picture, you can do it by pen (P key) our Lasso Tool (L key) and paste picture on the new layer. Hold shift key and mouse click on the layer thumb to make selection then take a new layer and fill White color in the selection and apply blur effect by following this path (Filter menu > Blur > Gaussian Blur) as done below.
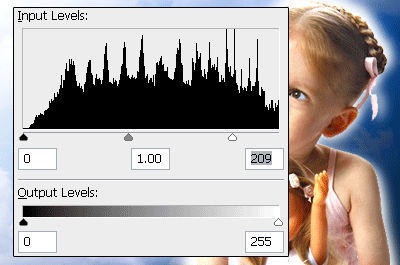
Come to child layer and make level the color, follow this path (Image menu > Adjustment > Level) and put same values as given below picture.
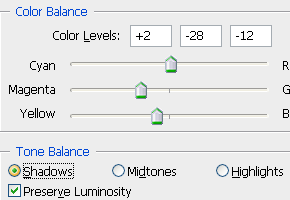
Now I am going to make color balance, follow this path (Image menu > Adjustment > Color Balance) and click on the "Shadows" and adjust the color levels.
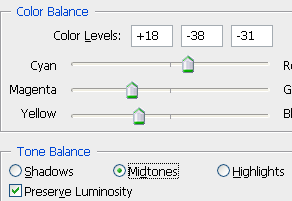
Still selected window click on the "Midtones" and make adjustment.
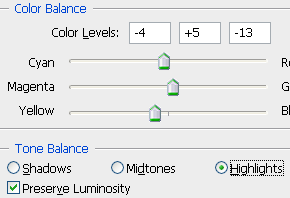
At last click on "Highlights" option and make adjustment.
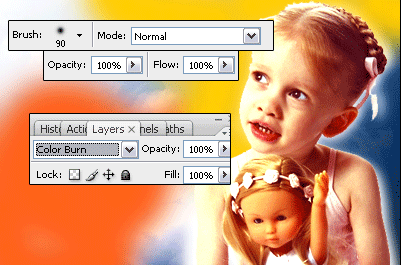
Take a new layer and choose Brush Tool (B Tool) then make settings in the optional bar. Change foreground color "#ff6318" and apply some part on the layer, change again foreground "#ff6318" to "#ffce08" and apply another part of the layer then change the blend mode "Normal" to "Color Burn".
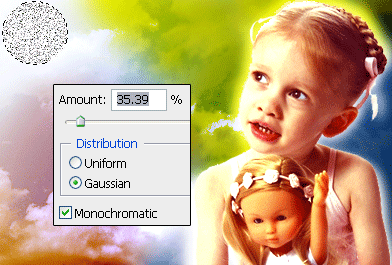
Now I have to show a sun rays, take a new layer and draw circle selection by the Elliptical Marquee Tool (M key) with white color. Follow this path (Filter menu > Noise > Add Noise) and set amount as below.
Still selected layer follow this path (Filter menu > Render > Ripple) and set amount "-597" with size, now apply radial blur by following this path (Filter menu > Blur > Radial Blur) and make settings as done below picture.
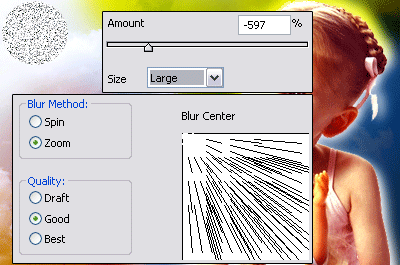
Press Ctrl + F two time more to apply effective rays, make duplicate layer and adjust the position then change blend mode "Normal" to "Linear Light".
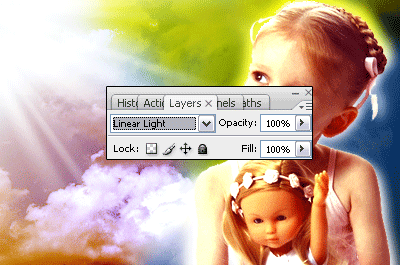
In this step I am going to insert an angel picture, take any angel picture and paste on the document if the size is large make it small then adjust position on the light area as below picture.

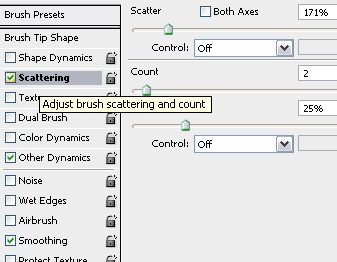
Apply some stars coming from the angel, select brush tool (B key) and press F5 then make settings and apply on the new layer.
This is the final result.

Santosh Kumar
This is santosh kumar living in New Delhi (India) and love to work as a Web & Graphic Designing. I like to create sketch, background, illustration and vector graphics. Tutorialbunch.com is a very good place where I express my creativity.
|