|
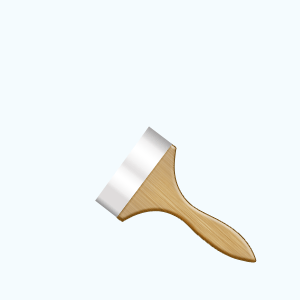
Paint Brush Icon
Hi Friends
I have a very interesting tutorial that is paint brush icon graphic in photoshop and going to teach you how can create it. I have described the process step by step to learn and make it easily. You will lean more about layer style, Gradient and Pen Tool because it has been made by these tools, I am sure you would not get any doubt during the drawing it and hope you like and enjoy.
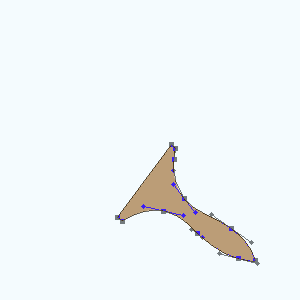
Start with a new layer by go to Fine menu > New, set any size as you required. Select Pen Tool (P key) and make a shape of the paint brush handle by some anchor point with selected "bb9d77" foreground color.
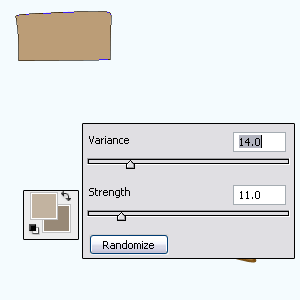
In this step I am going to apply wood effect, take a new layer and fill "bb9d77" color and apply noise filter. Go Filter menu > Noise > Add Noise amd set Amount "28.33", After done noise apply motion blur on same layer by go to Filter menu > Blur > Motion Blur and make.
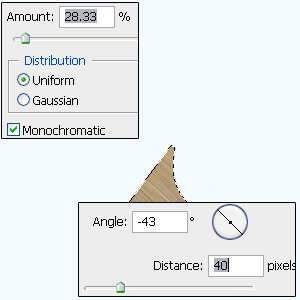
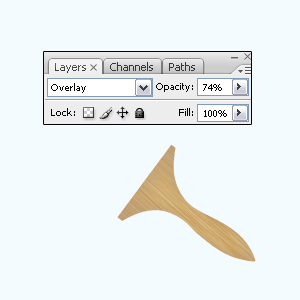
Still selected layer, go to blend mode and change "Normal" to " Overlay" with reduce opacity. The wood effect is completed.
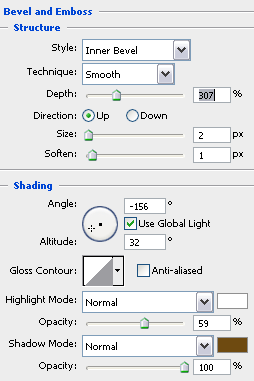
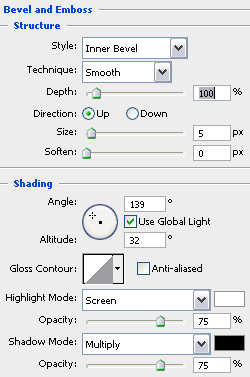
Now apply bevel effect on the handle, go Layer menu > Layer style > Bevel and Emboss. Change shadow color, reduce opacity, and angle.
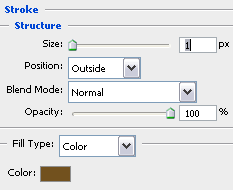
After applied bevel style on the handle, go to Layer menu > Layer Style > Stroke and make same settings with changed color.
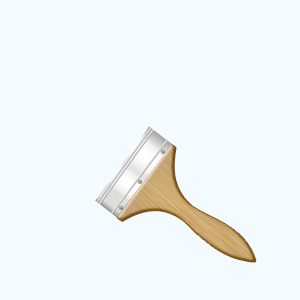
The brush's handle should be same.

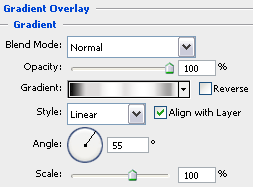
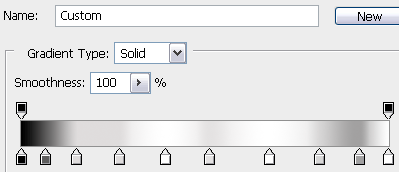
Now I am going to draw steel cover on the handle, select Pen Tool (P key) and make a shape by anchor points, apply gradient color by go to Layer menu > Layer style > Gradient Overlay. Clicks on the gradient and apply different color by new sliders.
The steel color is completed.
Select Line Tool (U key) and draw line on the steel cover but make sure the line should not be out of cover. Apply bevel on the line by go to Layer menu > Layer style > Bevel and Emboss and apply all these settings.
Still selected line layer make two more duplicate line and set on the different position, draw three dot by the Ellipse Tool (U key).
First set the foreground and background color, select Pen Tool (P key) and draw any shape with "#c2b3a0" color as you want to brush in the size. Now apply Fiber filter by go to Filter menu > Render > Fiber and make adjustment.
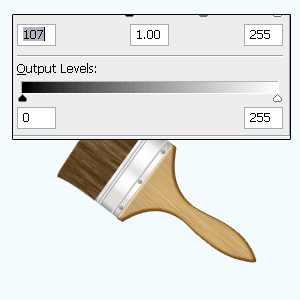
Increase color levels to make brush color dark and effective, go Image menu > Adjustment > Levels) and put same values.
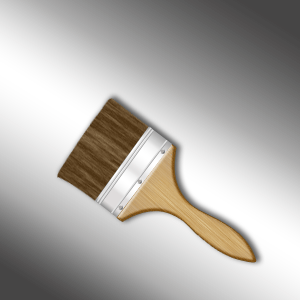
Apply background and get final result.
Santosh Kumar
This is santosh kumar living in New Delhi (India) and love to work as a Web & Graphic Designing. I like to create sketch, background, illustration and vector graphics. Tutorialbunch.com is a very good place where I express my creativity.
|