|
Steel Gear
Hi
I am here with a steel gear tutorial in photoshop and interested to share the technique
with you all, I have explain the technique with some easy steps those are given
in this example and sure you can also create same by follow them.
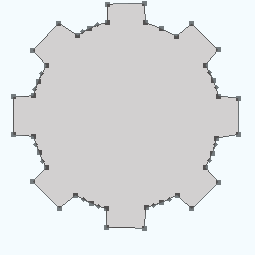
Start with a new document and set the size as your project required, select
Pen Tool (P key) and make anchor point with carefully like a gear shape as done
here.
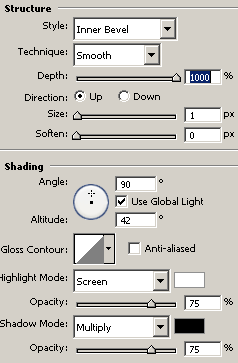
After drawn the shape apply bevel effect by following this path (Layer menu
> Layer style > Bevel and Emboss), change the color and adjust all the
settings as looking below.
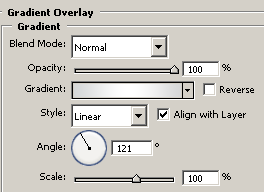
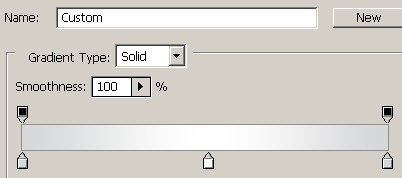
Apply gradient color effect on the shape by following this path (Layer menu
> Layer style > Gradient Overlay), select two color and adjust the
position then adjust another settings as here.
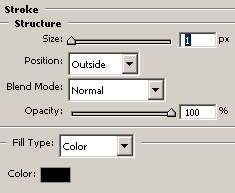
Now apply stroke on the shape by following this path (Layer menu > Layer
style > Stroke), change the color and make adjustment all the settings.
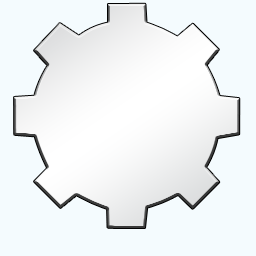
You should have this type of gear picture.
Select Custom Shape Tool (U key) and click on the shape option in the
optional Bar then choose "Circle Thin Frame" and draw on the shape.
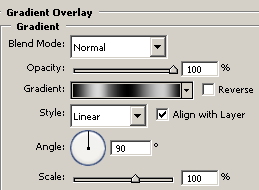
Now apply gradient color in the frame by following this path (Layer menu >
Layer style > Gradient Overlay), choose color and adjust the settings.
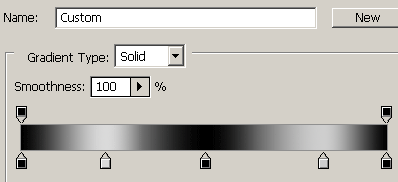
The picture should be look like this.

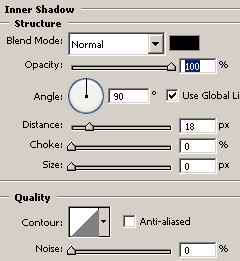
Select Ellipse Tool (U key0 and draw a circle in the middle of the gear shape
then apply inner shadow by following this path (Layer menu > Layer Style >
Inner Shadow), select color and adjust all the settings.
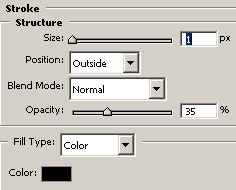
Now apply stroke on the shape by following this path (Layer menu > Layer
style > Stroke) and adjust the settings as done here.
The final steel gear is here.

Santosh Kumar
This is santosh kumar living in New Delhi (India) and love to work as a Web & Graphic Designing. I like to create sketch, background, illustration and vector graphics. Tutorialbunch.com is a very good place where I express my creativity.
|