|
Paint Brush
Hi Friends
I have created a paint brush graphic in illustrator and going to teach you the technique witch I used to create it, I have given all the steps in this tutorial to learn and create it easily. Follow it completely and sure you can also reach to final result, hope you like and enjoy.
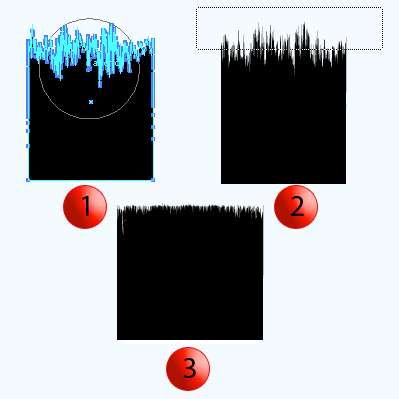
Start with a new document, select Rectangle Tool (M key) and draw rectangle shape with Black color then apply "Wrinkle Tool" on the top of the rectangle shape to make wrinkle effect, select Direction Selection Tool (A key) apply top of the wrinkle effect to select some anchor point and pull down by the down arrow key. I have made three part of the step those given in the below picture.
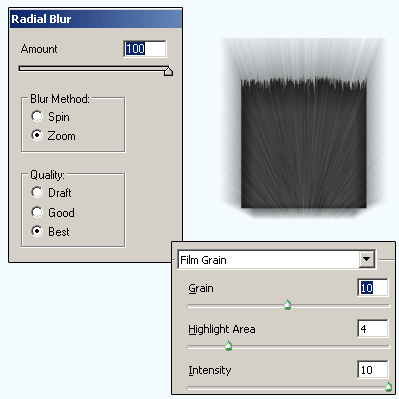
Still selected wrinkled rectangle shape make copy and paste on the same place (Ctrl + C, Ctrl + F), follow this path to apply effect (Effect menu > Artistic > Film Grain) and right values then apply blur effect by following this path (Effect menu > Blur > Radial Blur) and make settings as done below picture.
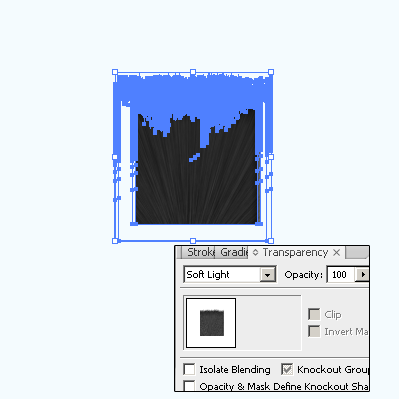
Select both shapes right click and choose "Make Clipping Mask" but make sure the wrinkled shape should be up on the rays picture. Select both shape and make them group by pressing (Ctrl + G) make copy and paste on the same place (Ctrl + C, Ctrl + F) then change the blend "Normal" to "Soft Light" as given below.
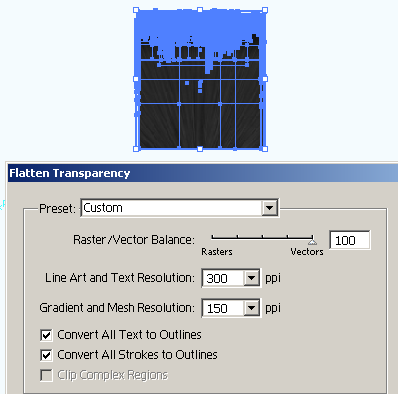
Now you have remove unwanted selection area of the brush, select brush and follow this path (Object menu > Expand Appearance), choose "Flatten Transparency" on same path and make settings as done below.
Now I am going to expand the brush by using warp option, follow this path (Effect menu >Warp > Arc) and put right values to get same effect on.
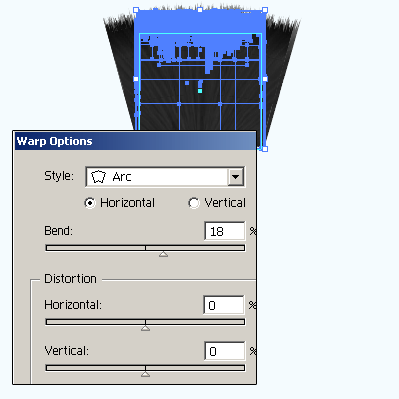
In this step I am going to draw a steel cover to bind one side of the brush, select Pen Tool (P key) and draw a shape with any color by some anchor point. Open Gradient Panel (Ctrl + F9) and take new sliders with different color then adjust angle.
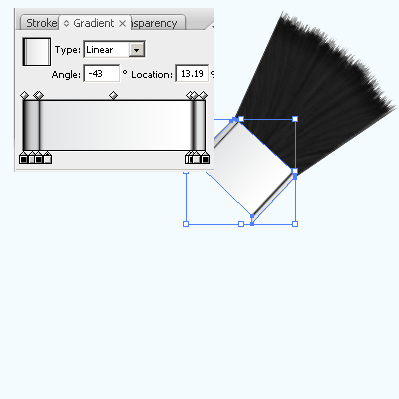
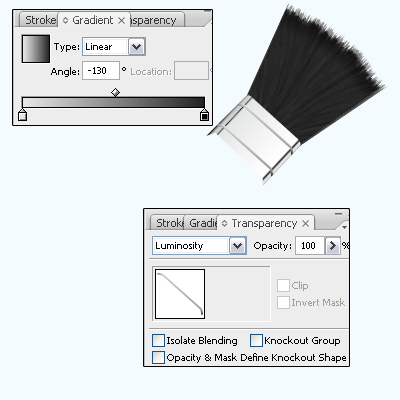
Now apply two line on the steel cover, select Pen Tool (P key) and draw line on the cover then apply "Expand" by following this path (Object menu > Expand) but make sure the "Fill Color" and "Stroke" option should be selected in the expand window then change blend mode "Normal" to "Luminosity".
It is time to draw handle, select Pen Tool (P key) and draw half part of the handle with "#5a3c4c" Fill color but make sure the stroke color should be block.
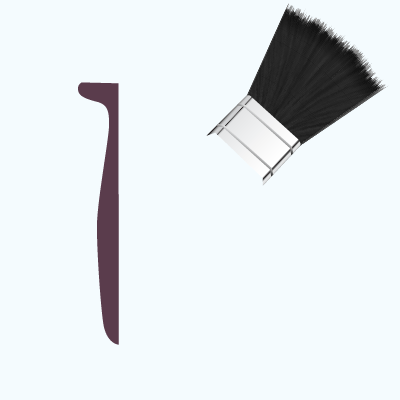
Select half portion of the hand and make duplicate copy by hold Alt key and press right arrow key, select copied part to make reflect by following this path (Right Click > Transform > Reflect) and select "Vertical" option then make joint both shape by click on the "Add to Shape area" in the Pathfinder Panel (Shift +Ctrl + F9) and finally press "Expand" button.
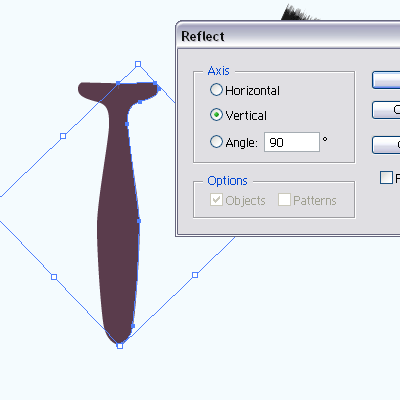
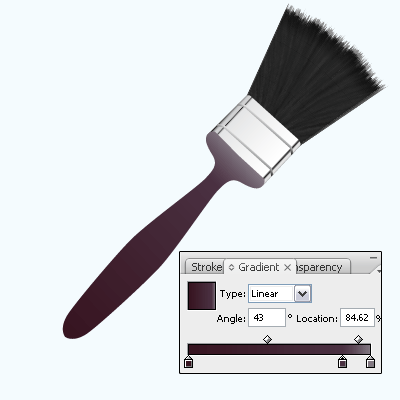
Now move handle by Selection Tool (V key) on the right position as joint the steel cover, open Gradient Panel (Ctrl + F9) and put different colors on the slider as given below picture.
Make copy and paste handle then reduce the size little bit and fill new color "#a24355", select Mash Tool (U key) and click on to give a different look by the mash.
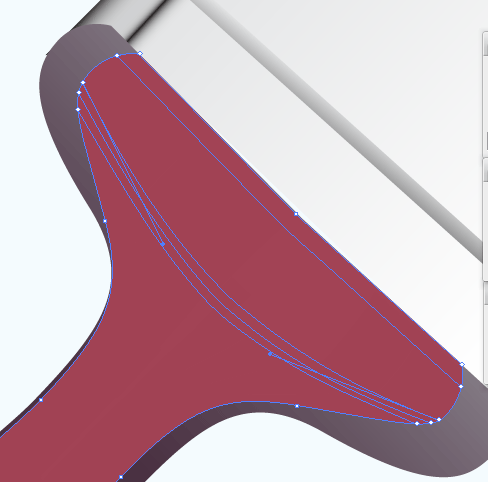
Now you have apply color on the mash selection, select Direction Selection Tool (A key) and select anchor point to modify position of the line then apply Fill color "#631A2B" as done below.
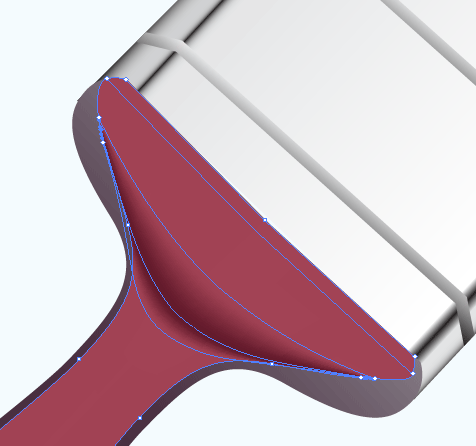
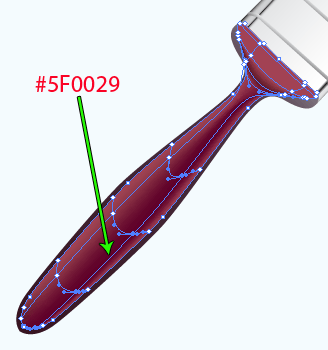
Now apply Mash Tool (U key) on another side of the handle and make selection by the Direct Selection Tool (A key) one line of them then apply "#5F0029" Fill color.
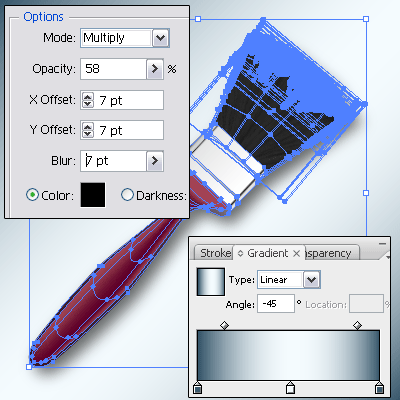
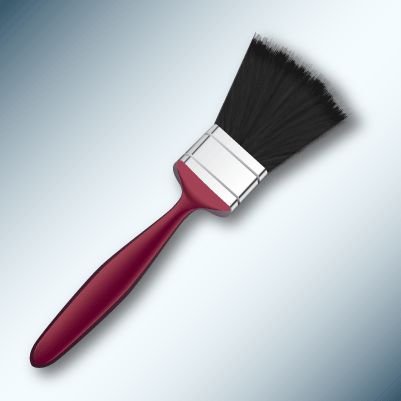
Select whole brush and make group by pressing (Ctrl + G) and apply drop shadow by following this path (Effect menu > Stylize > Drop Shadow) and put right values. Apply any background as you like but I have applied a gradient background as given below.
Final Result
Santosh Kumar
This is santosh kumar living in New Delhi (India) and love to work as a Web & Graphic Designing. I like to create sketch, background, illustration and vector graphics. Tutorialbunch.com is a very good place where I express my creativity.
|