|
Steel Bucket
Hi Friends
We use illustrator to create colorful background and vector graphic, there are many type of graphic to create. I am going to teach you how to create a steel bucket tutorial in illustrator, I have described this example by some simple steps and sure you would not get any doubt during drawing bucket. If you give different color to the bucket as you like, you should put color carefully by the Sliders in the Gradient Panel.
First, take a new document with appropriate size as required, select Pen Tool (P key) and create a half shape of the bucket with any fill color but make sure the Stroke color should be block. Open Gradient Panel (Ctrl + F9) and different colors in the sliders then make the similar distance each.
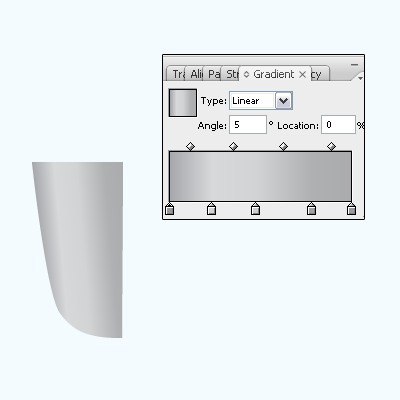
Make another half part of the bucket, select bucket shape and press (Ctrl + C, Ctrl + F) to make copy paste on the same place. Still selected copied shape right click and choose "Reflect" option then click on the "Vertical" to flip it vertically and adjust the position by the Right Arrow key.
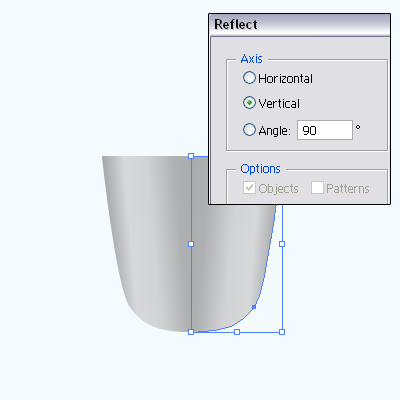
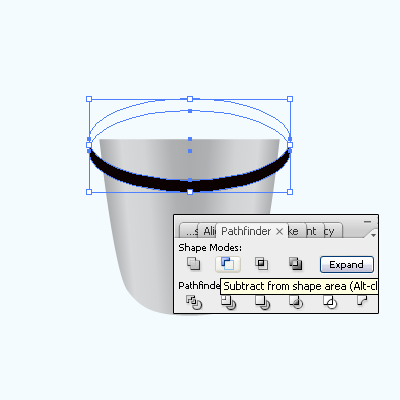
Select both shape and make them group by pressing (Ctrl + G), select Ellipse Tool (L key) and draw a circle on the top of the bucket. Select circle and make duplicate copy by pressing (Ctrl + C, Ctrl + F) then move up one circle by arrow. Now you have two circles and you need a line as curl shape so select both shape and click on the "Subtract from Shape Area" in the Pathfinder Panel (Shift + Ctrl + F9) to get little cut part of the circle.
Now I am going to apply steel color in the curled line, Open Gradient Panel (Ctrl + F9) and put colors on the sliders then adjust the slider position and apply stroke color as done below picture.
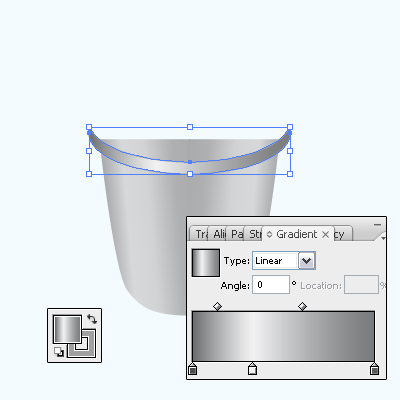
In this step I am going to draw shadow of the line, select curled line and apply shadow by following this path (Effect menu > Stylize > Drop Shadow) and adjust all the settings with changed color as below.
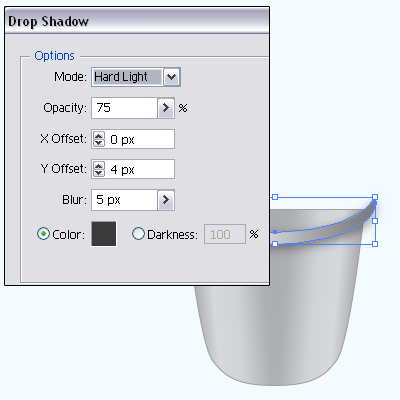
Select Ellipse Tool (L key) and draw a circle with any fill color but make sure the circle should be cover the curled line, draw one more circle with less size and put it in the middle of the first circle then make copy and paste (Ctrl + C, Ctrl + F). Select both circle (Big and One Small) with hold Shift key and click on the "Subtract From Shape Area" in the Pathfinder Panel (Shift + Ctrl + F9).
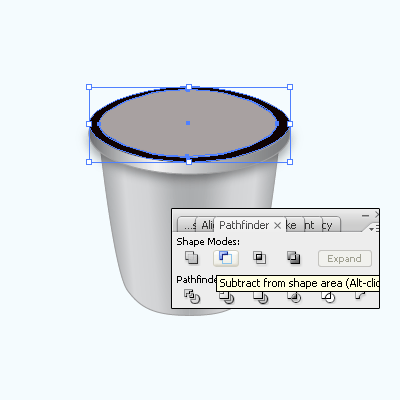
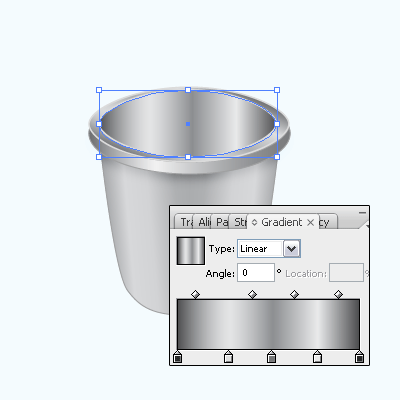
Now you have to apply gradient inside the cut part of the circle, select and open Gradient Panel (Ctrl + F9) and put different colors on the sliders with adjusted distance as done below.
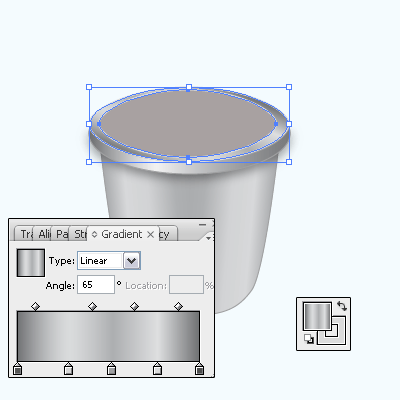
It is time to apply gradient inside the bucket, select circle and open Gradient Panel (Ctrl + F9) and put colors on the sliders look like the steel.
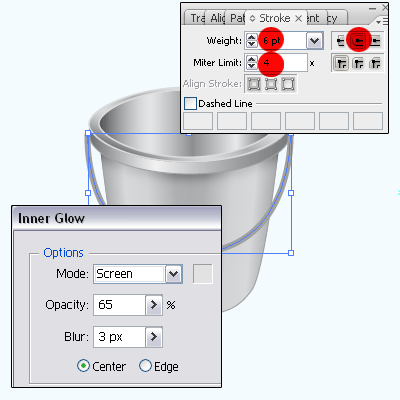
Select Pen Tool (P key) and draw a path like a handle of the bucket with "#a0a0a0" color, Open Stroke Pane (Ctrl + F10) and make changes as showing by the Red spot in the stroke panel. Make it expand by go to Object menu > Expand now it is available to apply color and effect, apply Glow by following this path (Effect menu > Stylize > Inner Glow) choose color and make settings as done here.
It is your work to apply shadow of the handle and bucket, draw bolt two side that is final result.

Santosh Kumar
This is santosh kumar living in New Delhi (India) and love to work as a Web & Graphic Designing. I like to create sketch, background, illustration and vector graphics. Tutorialbunch.com is a very good place where I express my creativity.
|