|
Bangle Ipod
Hi Friends
I am back with a creative and impressive tutorial that is a 3d Bangle Ipod, it is just like an apple bangle ipod. It is something different to create for me but I could do better work and want to share with you all. I have used 19 step to complete this vector graphic and these step are fully described to learn easily. It will explore your knowledge and hope you like and enjoy.
First of all take a new document with appropriate size as you required, select Ellipse tool (L) key and draw a oval shape and block Fill color. Choose stroke color "#aaaaaa" and make stroke settings.
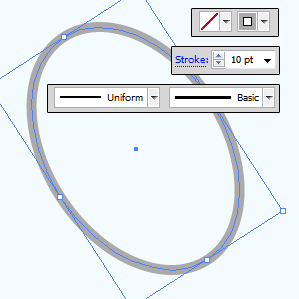
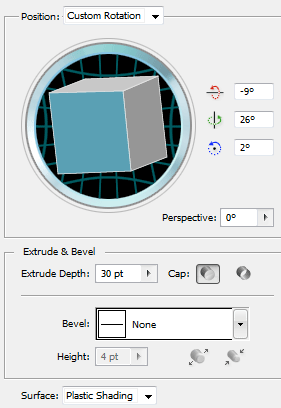
In this step I am going to apply 3D effect on the stroke, follow this path (Effect menu > 3D > 3D Extrude & Bevel) Option. A window comes on the screen and you have to make all the settings as given below picture.
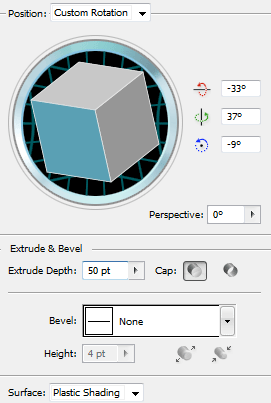
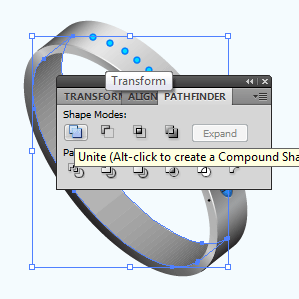
You should have a complete 3d bangle, select bangle and go to Object menu and choose Expand Appearance option then right click on the selected bangle and select “Ungroup” option two times. Select Direct Selection tool (A key) and select front area of the bangle by hold Shift key, open Pathfinder Panel (Ctrl + Shift + F9) and select as given below picture.
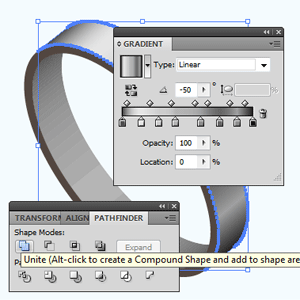
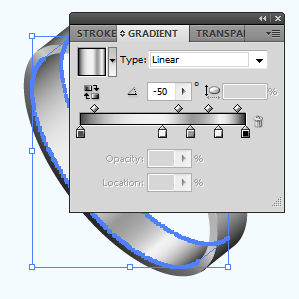
Select thick area of the bangle by the Selection tool (V key) and press Ctrl + F9 key to open Gradient Panel then apply gradient color and angle.
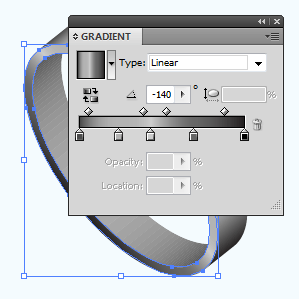
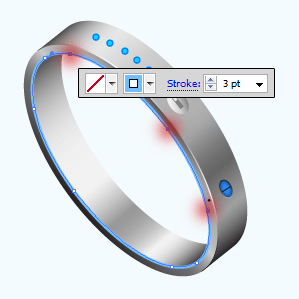
Still selected thick area press Ctrl + C and Ctrl + F to make copy paste on same place, select anchor points of outer stroke by using Direct Selection tool as pointing by Red color then press Del key.
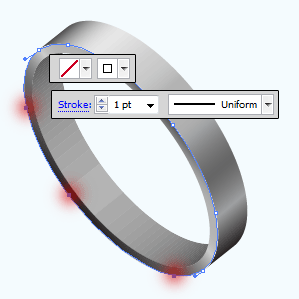
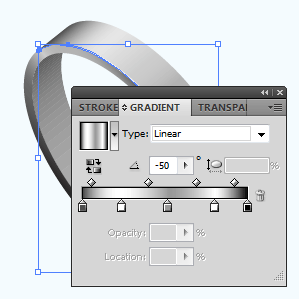
Now I am going to apply gradient color on the rest part of the stroke, open Gradient Panel by pressing (Ctrl + F9) and apply gradient color as done here.
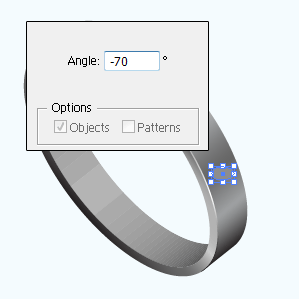
In this step I am going to draw button, select Ellipse Tool (L key) and draw oval shape then right click > Transform > Rotate and adjust angle.
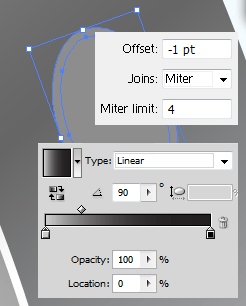
Still selected oval shape and go to Object menu > Path > Offset Path then adjust the path settings, select outer oval shape and open Gradient Panel (Ctrl + F9) then apply gradient color.
Select Inner oval shape and Fill color "#144785", go to Effect menu > Stylize > Inner Glow and apply same settings. Select Line Segment tool (\ key) and make stroke settings then draw in the middle of the button.
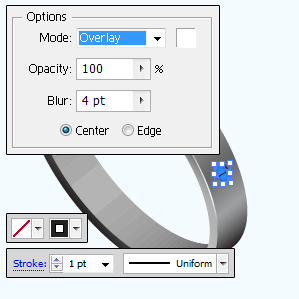
In this step I am going to draw a display screen, select Ellipse tool (L key) and draw an oval shape with any Fill color but make sure the stork should be block. Open Gradient Panel (Ctrl + F9) and apply color and angle.
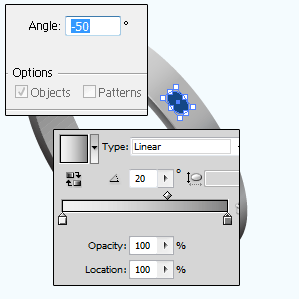
It is your work to draw two shapes inside as below.

Select Ellipse tool (L key) and draw circle "7ptX7pt" with "#4f80ff" color but make sure the Stroke color should be block, go to Object menu > Path > Offset Path then adjust all the settings. Select inner circle and change color "#4f80ff" to "#00dbff".
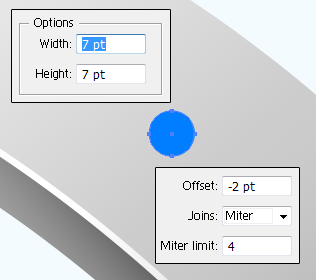
Select Ellipse tool and draw a little circle on the thick area, the front area work of the bangle has been finished.
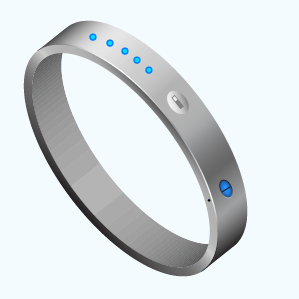
Now I am going to work inside the bangle, select Direct Selection tool (A key) and select inside area by hold Shift key then click on the "Add shape area" in the Pathfinder Panel (Ctrl + Shift + F9).
Still selected inner part of the bangle Ipod, open Gradient Panel (Ctrl + F9) and adjust the gradient color's slider and angle as done here.
Select Direct Selection tool (A key) and select anchor point of the thick area as pointing by Red color then press Del key. You would have half stroke and make stroke settings.
In this step I am going to convert half stroke into 3D line, select half stroke and follow this path Effect menu > 3D > 3D Extrude & Bevel Option then make all the settings as done in this picture.
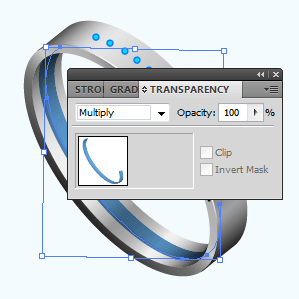
Open Transparency Panel by pressing (Shift + Ctrl + F10), select 3d line and change the blend mode "Normal" to "Multiply".
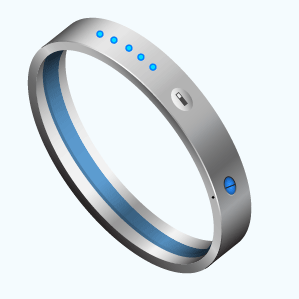
The Bangle Ipod is completed.
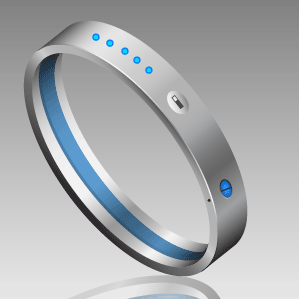
Apply any background and use.
Santosh Kumar
This is santosh kumar living in New Delhi (India) and love to work as a Web & Graphic Designing. I like to create sketch, background, illustration and vector graphics. Tutorialbunch.com is a very good place where I express my creativity.
|