|
3d Shopping Basket icon
Today, you are going to learn how to create a red vector 3d shopping basket icon in illustrator. It can be used ecommerce site to show collection the number of products, inthese day's it is so popular to shop online. you can also create you own this type of icon by following this example; I have used some simple steps and you have to just follow them to reach on final result.

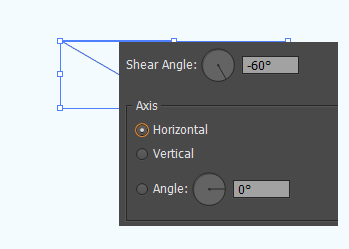
Take a new document and draw a rectangle shape with any stroke color only and strock size should be "2pt", right click on the shape and choose Transform > Shear, change the angle 60O and Horizontal.
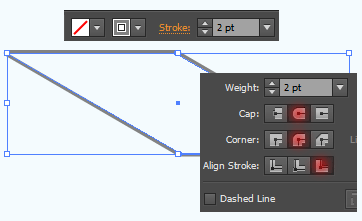
Now work on the stroke, open stroke window (Ctrl + F10) and make setting Cap, Corner and Align Stroke as showing red color.
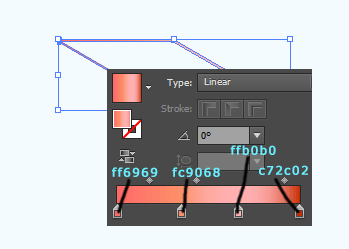
Apply Grading color in the stroke, go to Object menu and choose Expand and open gradient window (Ctrl + F9). Insert four slider and choose differne color of them.
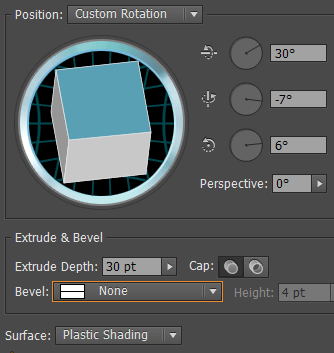
Move to 3D effect, still selected image go to Effect menu > 3D > Extrude & Bevel. Adjust all these settings as done here.
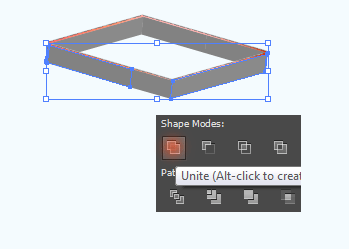
You get this 3D picture and you have to break all the parts to apply differnet color. First ungroup all by right click and choose ungroup option. Make selection front part of the image with hold shift key by Selection Tool (V key). Open pathfiner window and click on the "Unite" as showing red color, do it again on the back part.
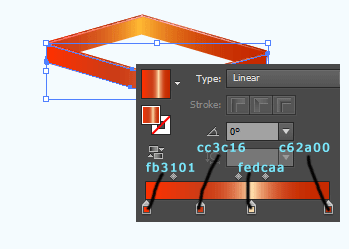
Now you have to apply gradient color on the both side, open Gradient window (Ctrl + F9) and insert four slider and adjust their position with different color.
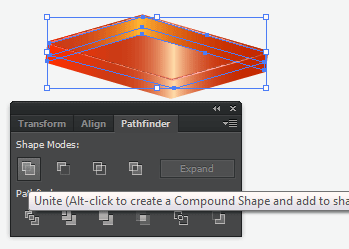
Select Pen tool and draw a shape and send back by pressing (Ctrl + [ ), still selected shape hold shift key and select back part. Open Pathfiner window and click on "Unite" to joint both shape. Select front part and apply drop shadow by go to Effect menu > Stylize > Drop Shadow.
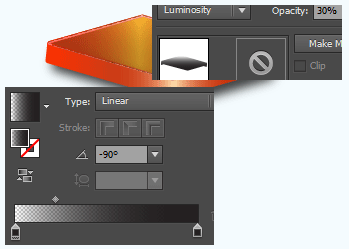
Still selected upper shape make copy and paste on same place by (Ctrl + C, Ctrl + F), apply gradient color and change angle. Open Transparency window (Shift + Ctrl + F10), change blend mode "Normal" to "Luminosity" and reduce opacity "100%" to "30%".
Select Pen Tool (P key) and draw a shape with stroke color "#a34606"then send back, open gradient window and apply different color.
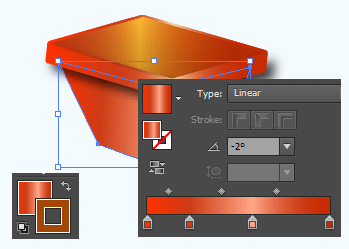
Select Rounded Rectangle Tool and draw thick line with given setting, make copy and paste then move a little bit. Select First thick line and apply gradient color but make sure second line should be white.
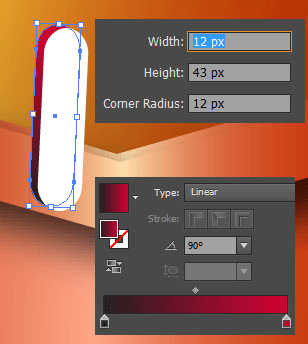
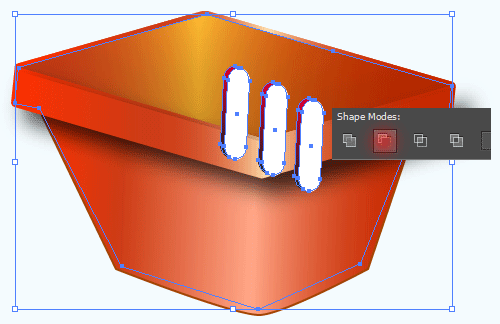
Selct both shape and make group then make two more duplicate and adjust the position like this. Select inner part of the basket and make duplicate copy on same place, select thick lines with shift key and click on the "Minus Front" option in the pathfiner window. Do it one more time on back shape.
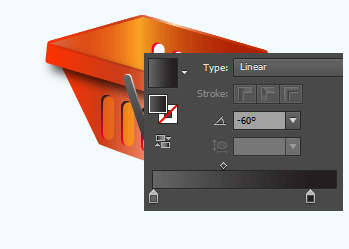
It is time to draw handle of basket, select Pen Tool and draw a hand line with "7pt" stroke with different settiings. Make expand by go to Object menu and choose Expand, apply gradient color with "-60O" angle.
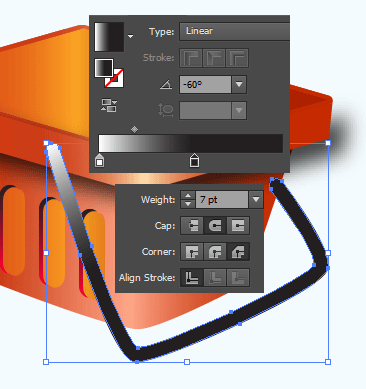
Make duplicate copy of the handle and move a little bit then apply diffetent gradient color, select Ellipse Tool (L key) and draw on the top of the handle then apply both step.
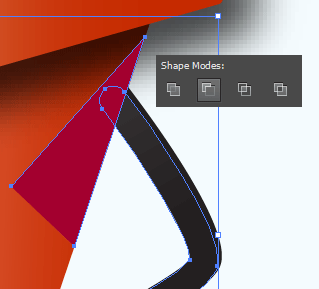
In this step you remove unwanted part, select pen tool and draw tringle shape on the handle. Select both shape and click on the "Minus Front" option in the pathfinder window.
Your basket is completed.

Santosh Kumar
This is santosh kumar living in New Delhi (India) and love to work as a Web & Graphic Designing. I like to create sketch, background, illustration and vector graphics. Tutorialbunch.com is a very good place where I express my creativity.
|