|
Water Drop Effect
After rain, some water droplets can be seen on the flowers, leaf and everywhere on the grass so I have decided to create it. You will learn how to create water drops effect all over the picture by using the Photoshop.
We will use layer style to make shadows and highlights, the water drops don't have fix size so I will also apply some random water drops shape on the picture for perfect vision.
In the first step, we have to draw a water drop separately then apply on the whole picture so take a small canvas with any size as you like, I have taken here width="52" height="70" with green background, green background helps to stand out water drop on the leaf picture.
Come to the canvas, take a new layer by press (Ctrl + Shift + N) key select Elliptical Marquee tool (M key) and make a selection like a drop, select foreground color "White" and fill by Paint Bucket Tool (G key).
 
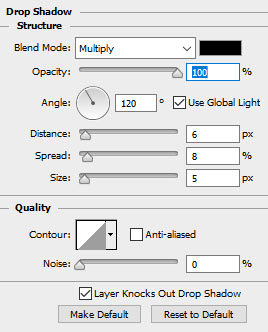
Let's try to apply some layer style to make it complete a water drops, first we are going to apply drop shadow. It makes the separation in between drops and leaf picture to looking good.
Go to Layer Menu > Layer Style and select Drop Shadow, a pop up will appear on the screen and you have adjust angle, color, blend mode with another setting as given below picture.
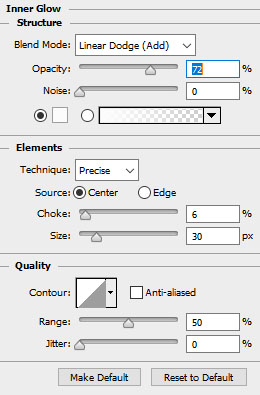
After done a drop shadow, you have a white oval spot, it is now usually effect so need to work on to make it glowing, We have to apply inner glow inside the white spot.
Go to Layer Menu > Layer Style and select Inner Glow, a pop up will appear. You have to adjust the blend mode and change the color "White" with another settings and done below picture.
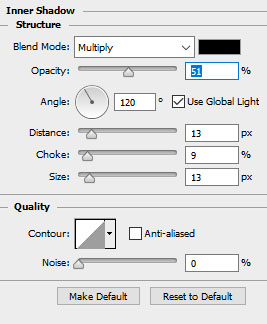
There is a little bit more work of shadow needed but this time it should be inside the white spot, it provides the adequate lighting on the drop and make it complete water drops effect.
Go to Layer Menu > Layer Style and select the inner shadow, you get a pop up on the screen and you have to change the color, angle with another effective settings as given below picture.
Finally a tiny white spot need on the top of the drop so take a new layer and draw with "white" color by Elliptical Marquee Tool then go to Filter menu > Blur and apply Gaussian Blur with radius "1.7".
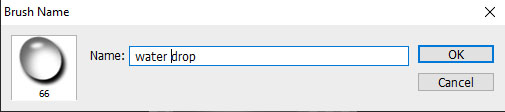
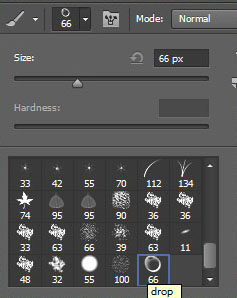
It is almost done but we have to apply it on the picture in different size and places so we should convert it in brush form, select all the layer one by one by hold Shift key.
Go to Edit Menu and select "Define Brush presets", a pop up appear and give a brush name "water drop". It is completed and ready to apply on the picture in the form of brush.

In the "Define Brush Presets" section, you have to define an unique setting of adjustment which give a perfect result on the picture.
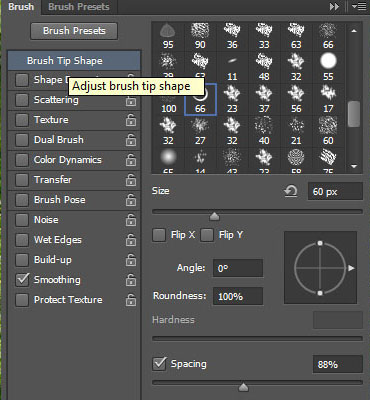
Select a Brush Tool (B key) and follow upper step to select "Define Brush Preset" then press "F5" key and adjust the size of brush but it is not fix, it will be changed frequently so don't worry.
In this step, we are going to change the profile of the brush. I have to adjust all these settings and suggest you apply same.
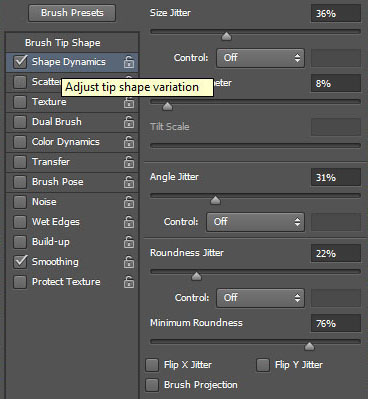
Now we have to change the shape and angle of the brush so click on the "Shape Dynamics" and adjust all these settings as done in the below picture.
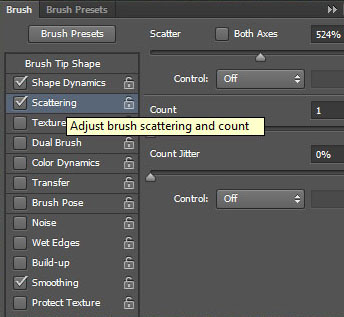
In this step, we are going to work in the "Scattering" option, it helps to do maintain distance between each water droplets so make all these settings sand to get perfect result.
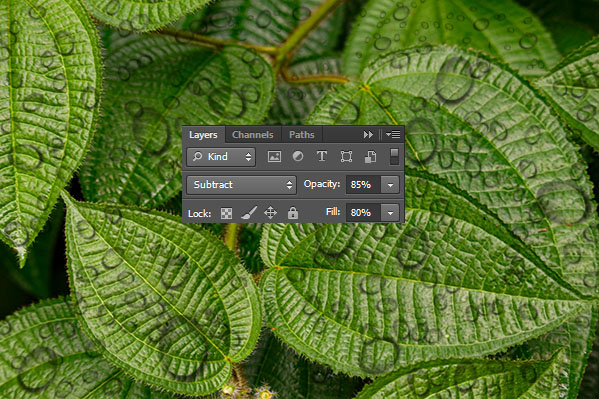
Finally one more step is left, take a new layer and apply one the canvas with different size and angle. This is a leaf picture and you are free to apply anywhere as you like to show water drops.
Now change the blend mode "Normal" to "Subtract" and reduce opacity "85%" and fill "80%".
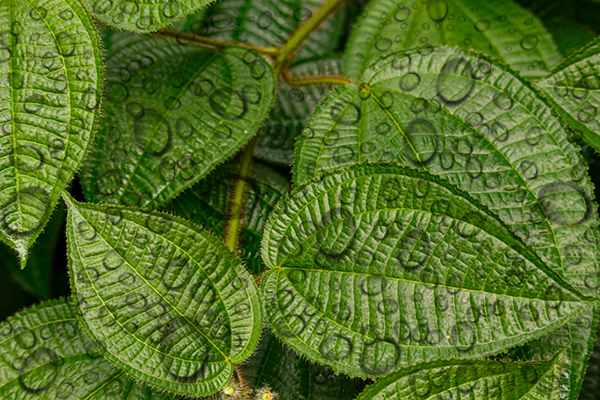
It has been done and this is your final result, enjoy.
Santosh Kumar
This is santosh kumar living in New Delhi (India) and love to work as a Web & Graphic Designing. I like to create sketch, background, illustration and vector graphics. Tutorialbunch.com is a very good place where I express my creativity.
|