|
Realistic Rusty Iron Chain
Creating realistic rusty effect iron chain graphic in photoshop is not easy but I have tried to make it easily
by my example, you will learn more about Layer style and blending mode. I have described briefly step by step, every step is
important so please don't miss any one.
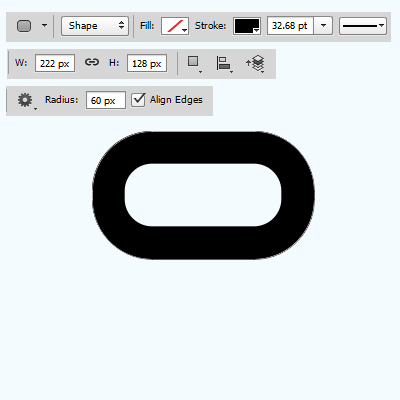
Take a new canvas by pressing Ctrl + N key and make necessary settings with appropriate size. Select Rounded Rectangle Tool (U key) and make adjustment then draw on the canvas with any size as you like.
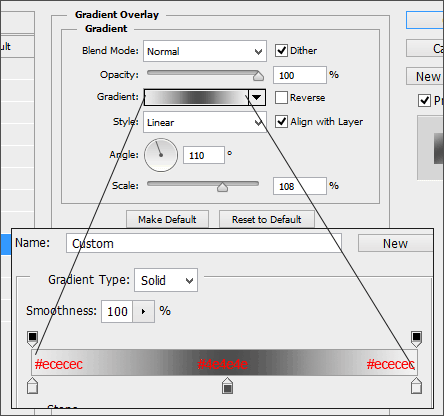
I am going to apply first layer style that is "Gradient Overlay" to apply lighting effect, go to Layer menu > Layer Style and choose Gradient Overlay and put right values. Click gradient option choose different on the slider and adjsut the position, their color has been given in the below picture.
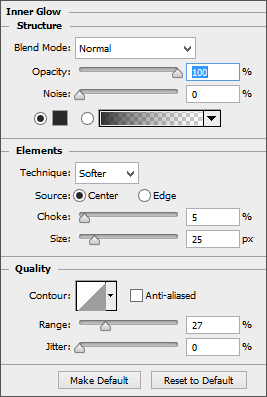
In this step, I am going to apply inner glow effect to apply different shade inside the iron chain. Go to Layer Menu > Layer Style and choose Inner Glow then adjust all these values and settings as given below picture.
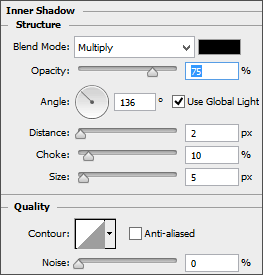
I am going to inner shadow effect inside the object; it will also give an extra lighting and enhance the appearance. Go to Layer Menu > Layer Style and choose Inner Shadow, change the color and angle with rest of setting as done below picture.
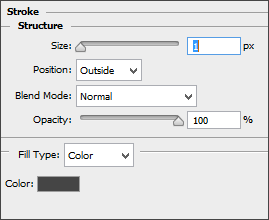
Apply a dark line around the object so I am going to use stroke style, go to Layer Menu > Layer Style and choose Stroke. Change the color "#454545" and all these settings carefully to get the best result as given here.
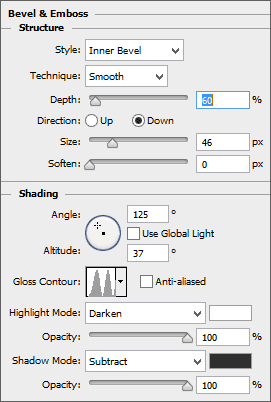
One more layer style is left and I am also going to apply, go to Layer Menu > Layer Style and choose Bevel & Emboss. A pop up will appeared and change both color and with their mode then adjust another settings as given below picture.
You have completed the link shape of the chain but the work is not done, you have to link many piece each other. Right click on the layer thumb and choose "Rasterize Layer Style" option, make duplicate layer and slide down.
Mouse click on the first link layer's thumb and come to second link layer, choose "Rectangular Marquee Tool" (M key). Hold Alt key and cover half portion of the link then press "Del" key but make sure during press Del key, the second link should be selected.
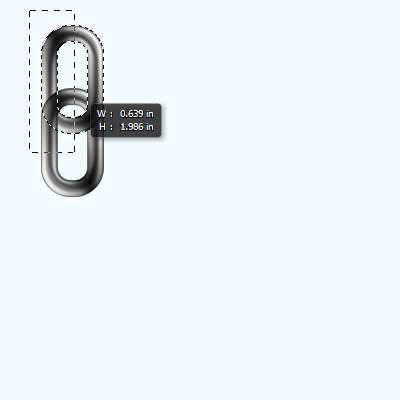
Apply this step to make more links and linked each other as given below to make complter a chain.
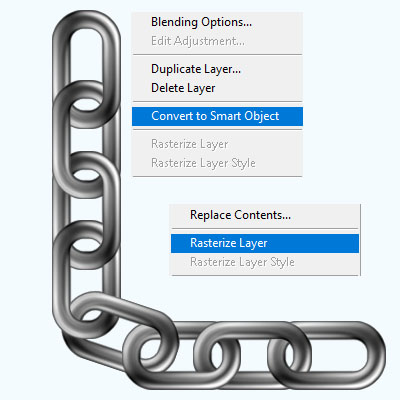
Now going to apply a rust effect on the chain to look like a realistic rusty iron chain, select all the link's layer and right right click then choose "merge layer".
After merged layers, right click and choose "Convert to smart object" then again right click and choose "Resterize layer".
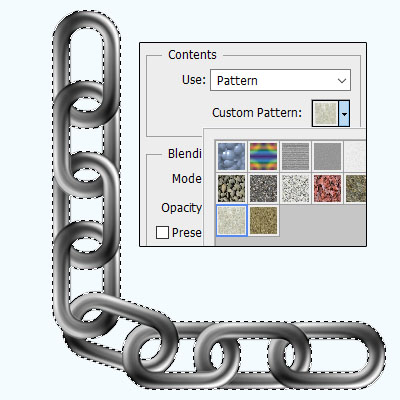
In this step, I am going to apply a rust effect on the chain. Still selected iron layer, mouse click on the layer's thumbnail with hold Ctrl key to make selection.
Take a new layer and go to Edit menu > Fill. A pop up will appear on the screen. Choose "Textured Tile" as shoing in the below picture by blue tringle.
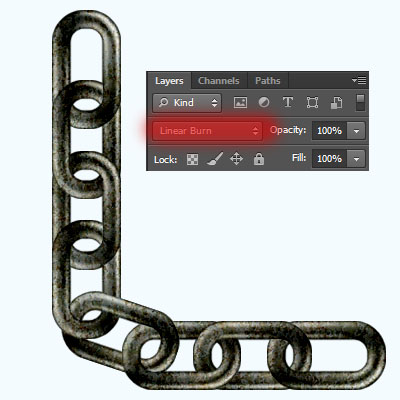
Now it is the final step, after apllied rust effect. Go to the layer style and change the layer style mode "Normal" to "Linear Burn" as showing by rest spot in the below picture.
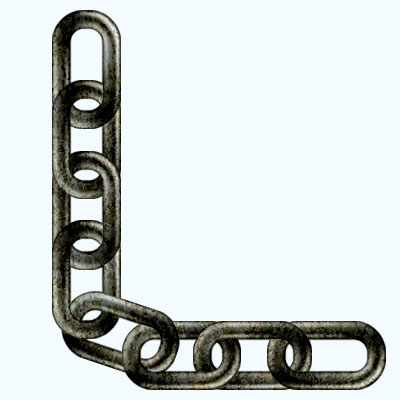
Your rusty iron chain graphic is completed so you are on final result below
Santosh Kumar
This is santosh kumar living in New Delhi (India) and love to work as a Web & Graphic Designing. I like to create sketch, background, illustration and vector graphics. Tutorialbunch.com is a very good place where I express my creativity.
|