|
Duct Tape
Many times you have seen duct tape and used also, now you have a chance to
learn how to create duct tape in the Photoshop. I have tried here to make it easy with
some simple steps and used layer style and pen tool.
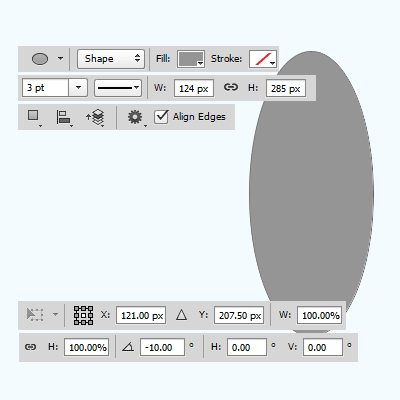
First You need a new document so press ctrl + N key, a popup will appeared and adjust all the settings as you required. Choose Ellipse tool (U key) and draw an oval shape with "#959595" color then change layer name "Oval 1".
In the property bar of the Ellipse tool, adjust all the values and option to get best result. Press Ctrl + T key to make transformation so go to its property bar and change the angle of oval shape all these settings are given here.
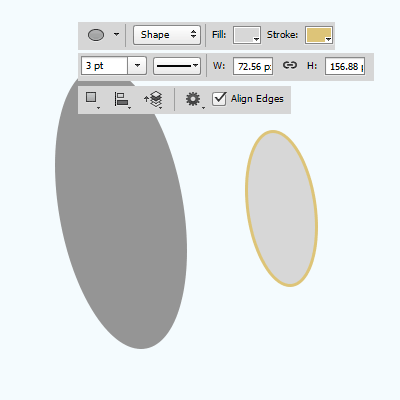
In this step you have to draw again a small oval shape with stroke, Select Ellipse tool and make different settings in the option bar then draw small oval shape in comparison of first then named the layer "Oval 2".
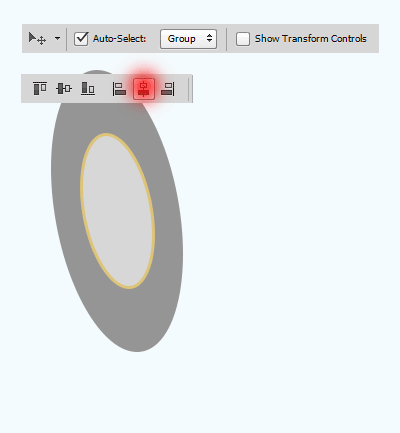
In this step you have to make centered both shape together, it is will be the inner part of the duct tape. Hold Shift key and click on the both shape layer's thumbnail, to make selection, come to property bar and choose the "Align Horizontal Center" as mention below by red spot.
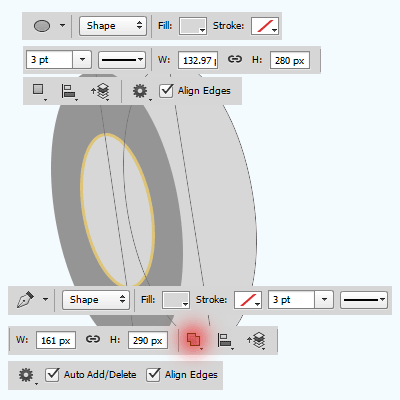
It is time to make it as 3d look wheel, select "Oval 1" Layer and make duplicate layer and named it "Oval 3". Adjust the position of oval shape as a wheel, choose Pen tool (P key) make adjustment of setting in the option bar and select the "Combine Shape" option as showing red spot in below picture.
Still selected option, apply pen tool on the top of "oval 3" shape and second point will be top of the "Oval 1" layer then point on bottom of "Oval 1" and finally point bottom of "Oval 3". You duct tape wheel is completed.
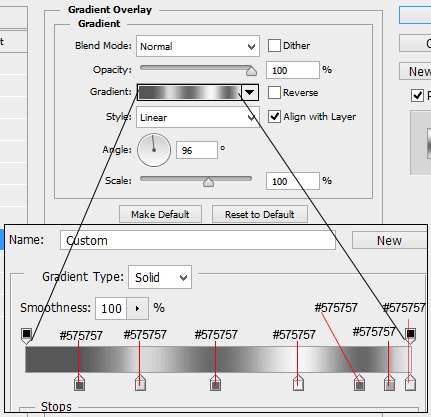
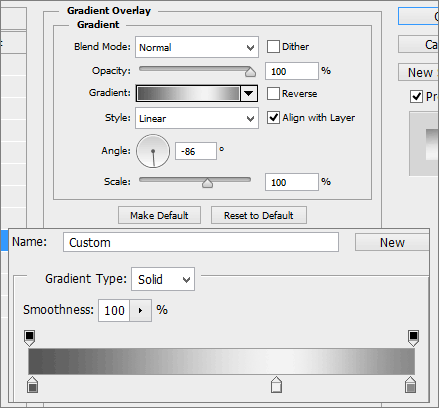
After completing the wheel, you have to apply gradient effect on the combined shape. Select "Oval 3" Layer and go to Layer menu > Layer Style > Gradient Overlay.
The gradient popup will appeared and adjust all these settings as given below picture; I have given here a complete gradient color combination with their color code and position.
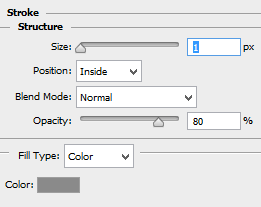
Apply a dark stripe around the shape to complete it, go to Layer Menu > Layer Style > Stroke and adjust all these settings as given below picture.
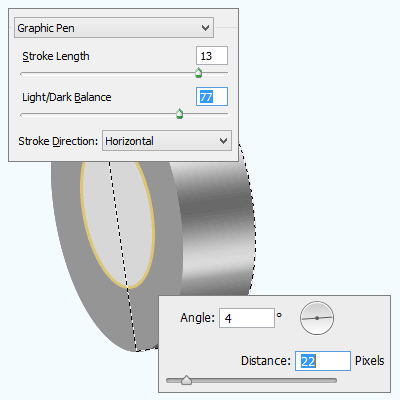
It is time to apply a texture on the duct tape to look natural, mouse click on the oval 3 layer's thumb with hold CTR key.
Take a new layer and fill any color in the selection, go to Filter menu > Filter Gallery > Sketch > Graphic Pen and adjust the value.
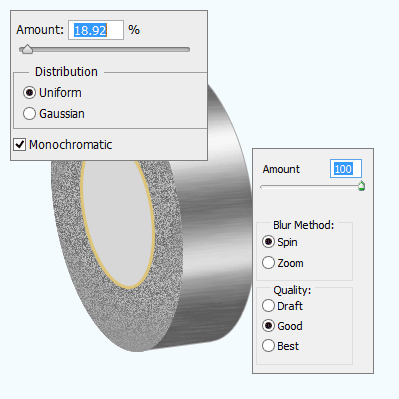
Now apply motion effect, still selected this layer and go to Filter Menu > Blur then choose Motion blur and adjust the values as given below.
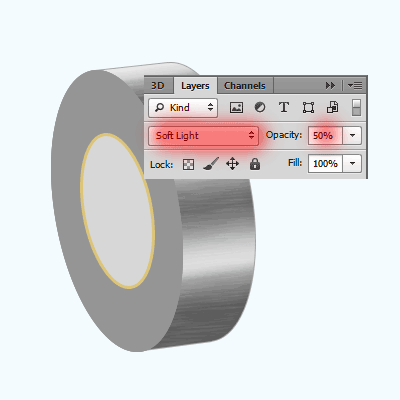
You get the duct tape texture; there is one more step to go. I am going to change the layer style mode like "Normal" to "Soft Light" and reduce the opacity "100%" to "50%" as showing by red spot here.
Come back to "Oval 1" layer, there is also one more effect to apply. Go to Filter menu > Noise > Add Noise, a popup will appeared and you have to put right value then apply Radial Blur by go to Filter menu > Blur > Radial Blur as I have done below picture.
Now we are on the final step that is gradient effect on the "Oval 2" Layer, still selected this layer apply gradient layer style as I have done here.
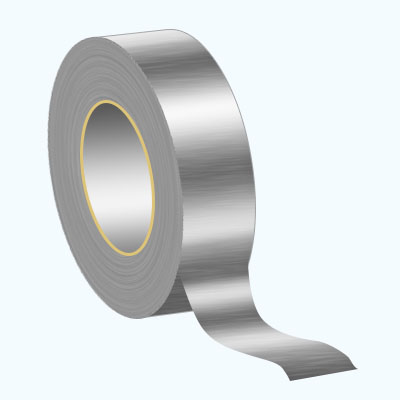
I have created a stripe of duct tape and you have to create it yourself that would be your final result, enjoy.
Santosh Kumar
This is santosh kumar living in New Delhi (India) and love to work as a Web & Graphic Designing. I like to create sketch, background, illustration and vector graphics. Tutorialbunch.com is a very good place where I express my creativity.
|