|
Firewall Icon
I am here with a new tutorial that is firewall icon in the photoshop and it has been designed by using photoshop, it can be used in the
anti virus protection software and project. You will lean a technique to create a
firewall icon by the help of this example, it has some easy steps and you have
to follow them to reach final result.
In the starting, you have to take a new document with appropriate size as your
project required, select a Custom Shape Tool (U key) and click on the
"Shape" to choose a "Sign 6" then draw on the document with
any color.
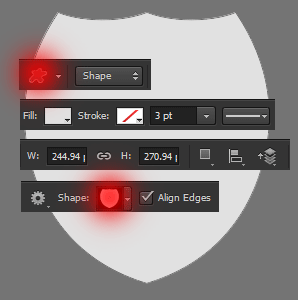
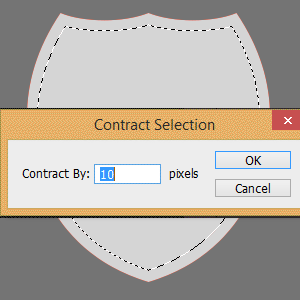
Now you have to make one more inside the shape, click on the layer thumb by hold Ctrl key to make selection, go to Select menu > Modify > Contract selection and put value "10px". Make cut and paste on same place, it will show on new layer then fill red color by paint bucket tool (G) key.
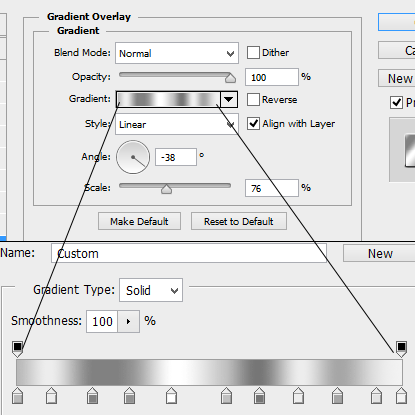
Now apply gradient color effect inside the outer shape, come back on first drawn shape. Following this path (Layer menu >
Layer style> Gradient Overlay), click on gradient and apply different color to look like steel part as given here.
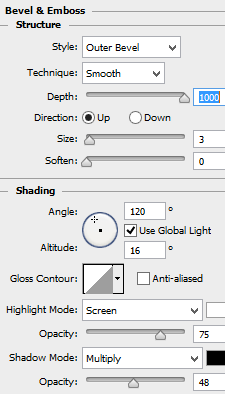
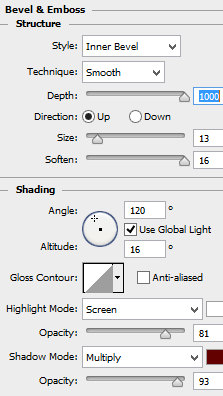
In this step you have to make emboss effect, go to Layer menu > Layer style > Bevel & Emboss. Change the color and adjust all these settings as given below picture.
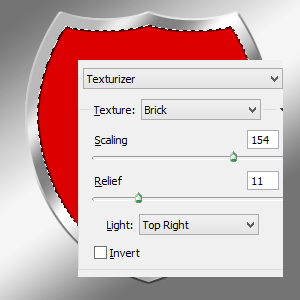
Now come on inner part of shape and apply bricks effect, go Filter gallery > Texturizer and adjust the all same settings as below.
Now apply emboss effect on inner shape, change colors, angle and another option as given here.
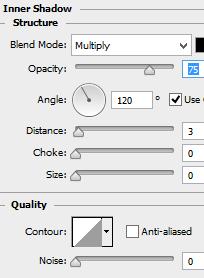
Apply shadow inside the shape, go to layer menu > layer style > Inner Shadow, change the color, opacity and another options.
In this step, insert fire symbol on, select Rectangular Marquee Tool (U) key and choose shape in the tools properties.
you have apply light effect on the icon, make selection of inner part by hold Ctrl + mouse click on layer thumb and then do it same on outer shape layer with Ctrl + shift key.
After selection take a new layer and fill white color then reduce the layer opacity as given here.
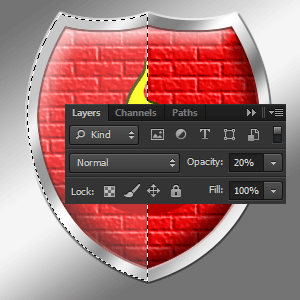
This is the final result.

Santosh Kumar
This is santosh kumar living in New Delhi (India) and love to work as a Web & Graphic Designing. I like to create sketch, background, illustration and vector graphics. Tutorialbunch.com is a very good place where I express my creativity.
|