|
Blinking Eye Animation
Today, I have a very interesting tutorial that is blinking eye animation in photoshop and also excited to share with you all. You will learn here how to create a winking eye effect on any still picture; it is just an adjustment technique that makes it more impressive and effective so let's start.
You need a still wink eye picture to make this effect. I have selected a boy picture who is enjoying beech. He wink his one eye, it is so suitable for my job here.
"This picture has been taken for the learning purpose."

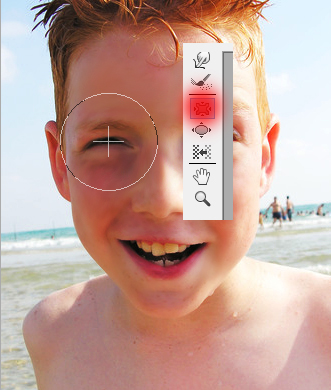
Now you have to make eye position as wink mode so I am going to shrink the wink eye and eyebrow. Press Ctrl + J key to make duplicate layer picture, go to Filter menu and choose Liquify option. In the opened liquify window, choose Pucker Too (S key) and click on the blink eye one time as showing Red spot in below picture.
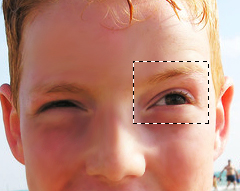
Choose Rectangular Marquee Tool (M key) and make selection of opened eye then copy paste it on second close eye and adjust the eye position as real.
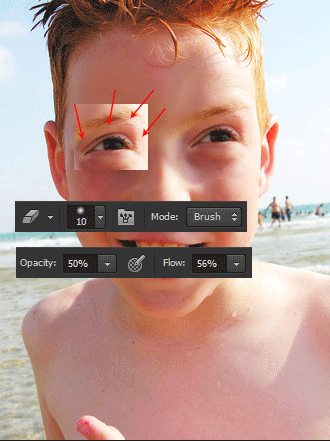
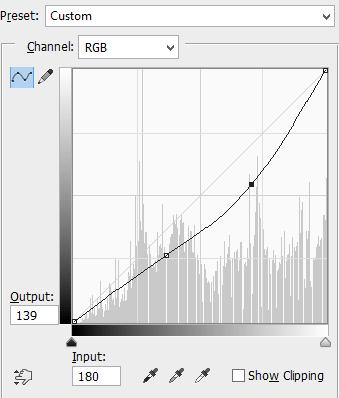
Choose Eraser Tool (E key) and adjust size and another option, apply it around the copied eye as showing by red arrow. After done it you see you copied eye is lighted and not matching with background so you have to apply "Canvas" by pressing M key and adjust the graph as done below.
After done upper step you get the rough eye image so go to Image menu > Adjust and choose Brightness/Contrast then adjust both of them to make more enhance.
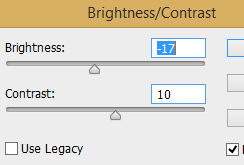
Now you have a whole modified picture and separate eye layer and let's go to make animation. Go to Window menu and choose "Timeline", in the timeline select frame animation. Take a new layer and hide the eye layer and follow these frames to next new two frames then adjust the time "5" as given below picture.
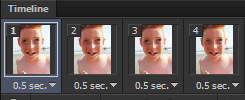
This is the final result.

Santosh Kumar
This is santosh kumar living in New Delhi (India) and love to work as a Web & Graphic Designing. I like to create sketch, background, illustration and vector graphics. Tutorialbunch.com is a very good place where I express my creativity.
|