|
Angry Monkey Face
Hi Friends
If you are looking to create an angry monkey face tutorial in illustrator, this example will help you because I have drown this type of face and fully described by some simple step, it is very easy to create, I am sure you can also make it by using these step. You will learn more about effects, pathfinder and gradient, hope you like and enjoy.
Take a new document and adjust size as you need, select Ellipse Tool (L key) and draw a circle with "#8c6d45" fill color but make sure the stroke should be block. Make duplicate circle and reduce size little bit then open align panel by pressing (Shift + F7) and adjust horizontal and vertical align.
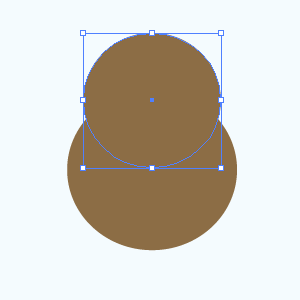
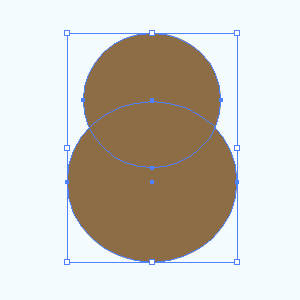
Hold Shift key and mouse click on the both circle to make selection, open Pathfinder panel by following this path (Window menu > Pathfinder) and click on "Add to Shape area" button.
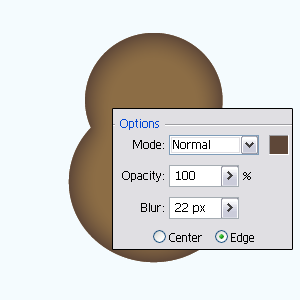
Now apply inner glow, still selected shape follow this path (Effect menu > Stylize > Inner Glow). A window come on the screen choose color and make another settings as done below picture.
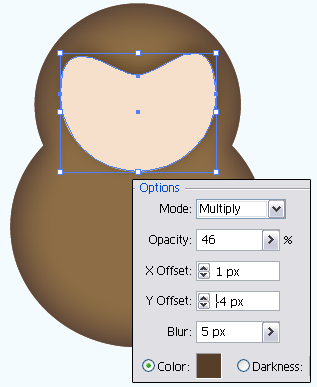
Select Ellipse Tool (L key) and draw a circle with "#f7e0cb" fill color but stroke should be block, select Direct Selection Tool (A key) and select top anchor point of the circle then pull down. Now apply drop shadow by following this path (Effect menu > Stylize > Drop Shadow) and make settings as done here.
Select Ellipse Tool (L key) and draw oval shape again with White color and stroke Black, follow this path (Effect menu > Stylize > Drop Shadow) choose color and make settings.
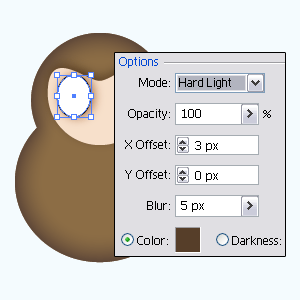
Draw again oval shape inside the White circle with Black color, make copy and paste white circle (Ctrl + C, Ctrl + F). Hold both oval shape (Black and white circle) and click on the "Intersect shape area" button in the Pathfinder (Shift + Ctrl + F9).
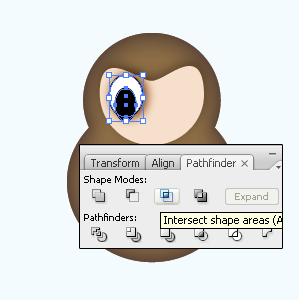
Now you have one eye, make duplicate eye and put on second eye place. Select Ellipse Tool (L key) and draw a circle with any color then follow this path (window menu > Gradient) and choose different color on the slider as below.
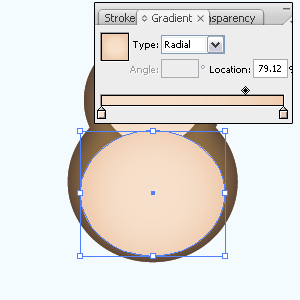
Now come to draw nose, draw again oval shape with any color and put on the top of the circle. Make circle copy and paste on the same place (Ctrl + C, Ctrl + F), select both shape by hold Shift key and open Pathfinder Panel (Shift + Ctrl + F9). In the oppend panel click on the "Intersect shape area" button to cut out part of the nose as done below.
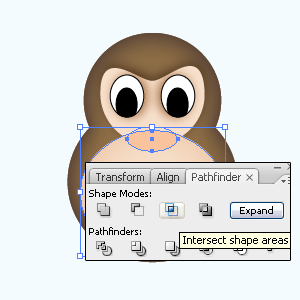
In this step I am going to apply gradient inside the nose shape, open gradient panel by following this path (Window menu > Gradient) and choose different color on the slider but make sure the stroke should be block. Draw nose's hole and ear yourself.
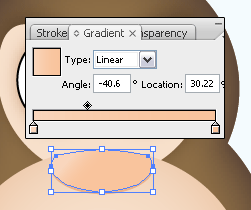
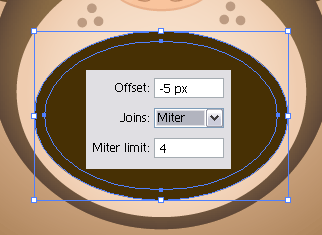
Let's draw monkey's mouth, select Ellipse Tool again and draw oval shape with only "#473004" fill color. Still selected oval shape follow this path (Object menu > Path > Offset Path) and make settings then apply Black color.
Select Black oval shape and make copy paste (Ctrl + C, Ctrl + F), select Rectangle Tool (M key) and draw two shape with only white fill color then select both shape (Black oval and White Rectangle) by hold Shift key and click on the "Intersect Shape area" button in the Pathfinder Panel (Shift + Ctrl + F9).
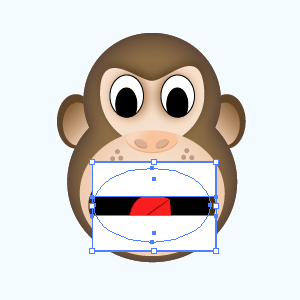
Select Line Segment Tool (/ key) and draw line on the white cut area then draw tongue yourself that is the final result as below.

Santosh Kumar
This is santosh kumar living in New Delhi (India) and love to work as a Web & Graphic Designing. I like to create sketch, background, illustration and vector graphics. Tutorialbunch.com is a very good place where I express my creativity.
|