|
Create 3d Beer Can
As you people very well know that in illustrator, 3D option is a very powerful tool, So Today, I am going to teach you how to create a 3d Beer Can without using 3d option and I have used a kingfisher label to stick for learning purpose. It is a little bit tuff job but done almost well. I have used Mesh tool to make 3d effect on can and color adjustment for lighting on.
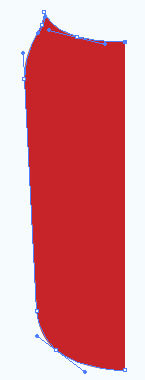
Take a new document with any size as you required then Select Pen tool (P key) and draw a half can shape with #c72429 fill color.
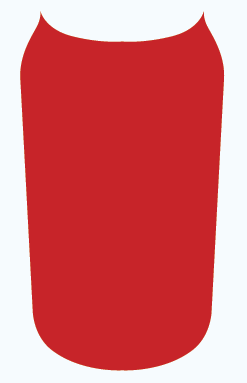
Make duplicate layer and flip horizontally by right click > transform > Reflect, select vertical middle anchor point and go to Object menu > Blend > Make. You get a complete shape of can.
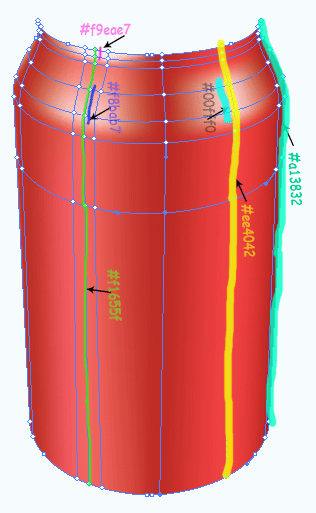
Now it is time to apply 3d effect on the shape, Select Mesh tool (U key) and apply on different position where you have to make different color spot. You got a lot of anchor point and you have to apply different color on them, I have mentioned here some group of points by different colored lines with color codes. You have to apply color code on colored lines anchor point.
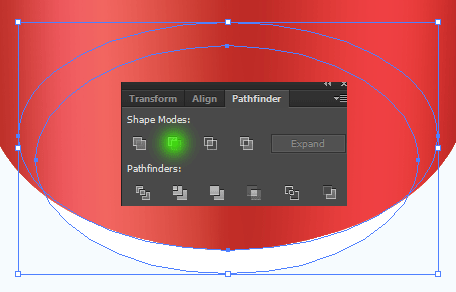
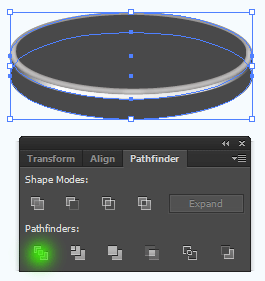
Now going to make base of can, select Ellipse Tool (L key) and draw an oval shape on the bottom, make duplicate and move up little bit then apply Minus Front in the pathfinder (Ctrl + Shift + F9) as done below.
Now apply inner glow, go to Filter menu > Stylize > Inner Glow. Choose different color and Adjust same settings as done here.
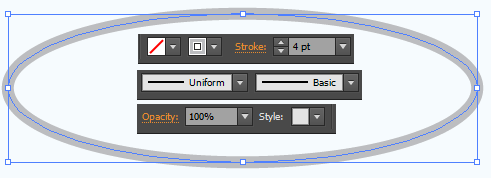
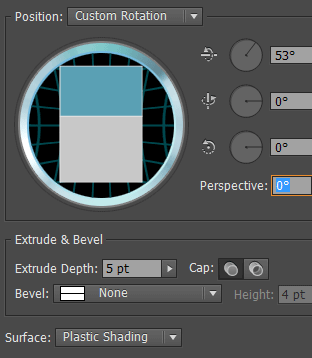
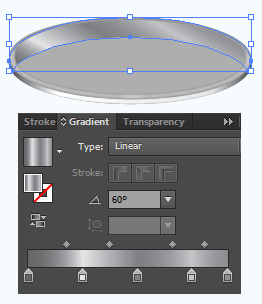
Now I am going to draw upper part of can, select Ellipse tool and draw an oval shape with only stroke #bcbdc0 color then apply 3d effect by go to Effect menu > 3D > Extrude & Bevel and adjust all these settings as done below.
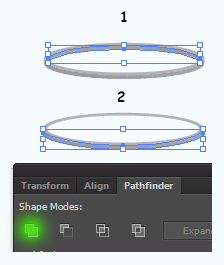
After done 3d effect go to Object menu > Expand then right click and choose ungroup. In the "1" number shape, select bottom part and press Del key. In the "2" number shape, select bottom part and apply "Unite" option in the pathfinder as showing green spot.
Now you have two shapes an oval and half oval, you have to work on them for lighting. Select oval shape and go to Filter menu > Stylize > Inner Glow, choose "#2a2b2a" color and adjust other settings. Select half oval and apply gradient color effect as given here.

Select Ellipse tool and draw an oval shape again but this time it should have fill color only. Make duplicate on same place by pressing Ctrl + C and Ctrl + F then move little bit down and click on "Divide" option in the pathfinder then delete unwanted area as showing green spot.
Change the inside oval shape's "#aeaeae" color, select cut part and open gradient, choose different color on slider then adjust the position, angle and type.
Note: Use color picker tool to get exact color.
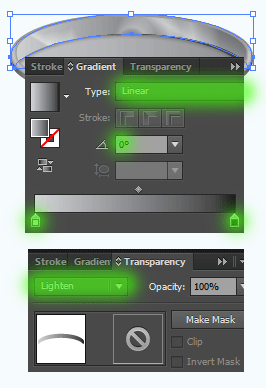
Now I am going to add some more lighting, make duplicate on same place as done up, apply different gradient color. Come to "Transparency" and change the blend mode "Normal" to "Lighten".
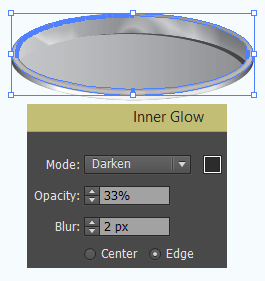
Select upper oval stroke and go to Effect menu > Stylize > Inner Glow, choose "#2b2c2b" color and change other option as here.
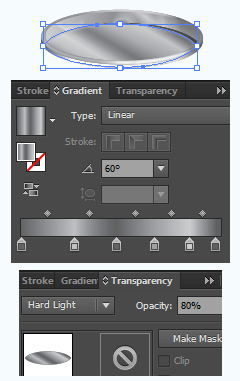
Still selected oval stroke make duplicate on same place, apply different gradient color and adjust the slider position then change blend mode in "Transparency" as given below picture.
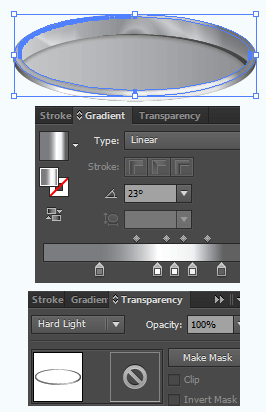
Now select oval shape and make duplicate then apply gradient color with different color, slider position and angle. Change the blend mode and opacity in "Transparency".
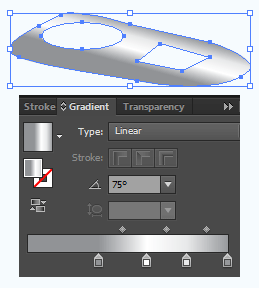
Select Pen Tool (P key) and draw open lid, create oval rectangle shape on it. Select all the shape and click on the "Minus Front" option in the "Pathfinder" then apply gradient color as given below.
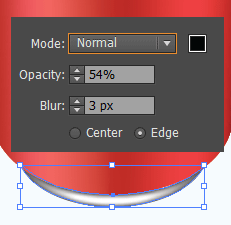
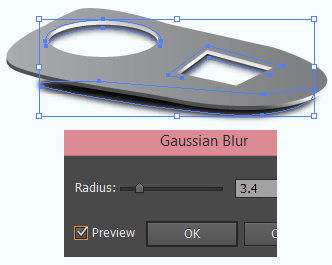
Make duplicate shape and move a little bit up and change the angle of gradient, select Pen Tool draw a short shapes under it with black color then go to Effect menu > Blur > Gaussian Blur.
Put it on the cap of can as an opener lid.
Come to cut rectangle hole, select Ellipse tool and draw an oval shape with "#999999" color. Make duplicate and move a little bit down then apply gradient color with black and white combination as given here.

Now you are trained and I am giving you a work, you have to apply two thick lines around the opener lid.
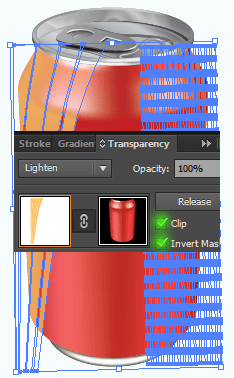
Insert any design as you want to apply on can, put design on the can. Make duplicate of can shape and press Ctrl + Shift + }, open "Transparency" and click on "Make Mask", Clip and Invert Mask options then change the blend mode.
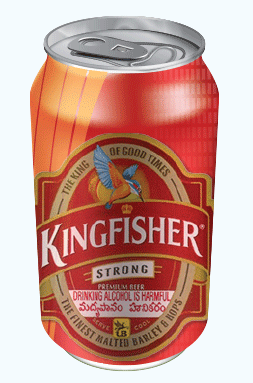
Now It is time apply any company label to complete it so I have selected well known kingfisher company label to stick on the can for learning purpose only. You have to follow upper step to cut the unwanted area of the leble for stick perfectly.
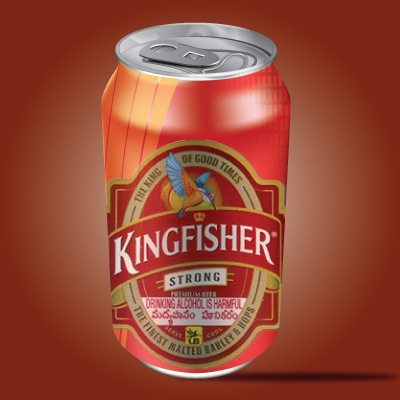
Apply any background with shadow as you like that is the final result.
Santosh Kumar
This is santosh kumar living in New Delhi (India) and love to work as a Web & Graphic Designing. I like to create sketch, background, illustration and vector graphics. Tutorialbunch.com is a very good place where I express my creativity.
|