|
Concrete Textured 3D Vase
Hi
In this tutorial you will learn how to create a black concrete textured vector 3d vase graphic in illustrator; first we design a 3d vase then apply concrete texture to look more real. It has been done by using Pen tool, gradient, blend mode and 3d filter. It is so easy to create by following this tutorial and sure you can also create and enjoy.
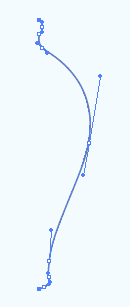
First open new document and select pen tool (P key) in tool pellet, draw a stroke line as a half shape of the vase with selected color "#7A7A7A" but make sure fill color should not be active.
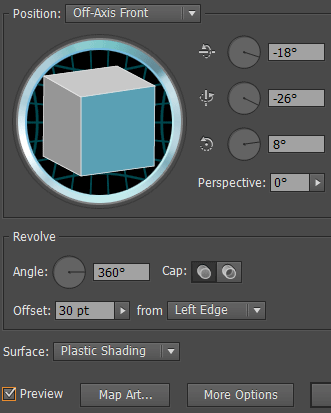
Select the path and go to Effect->3d->Revolve then adjust same setting as
given below. You can also see the preview of the settings by click on the
preview option.
After that you will get the shape like here, you can add some more lighting
effect on the vase by use same effect again.
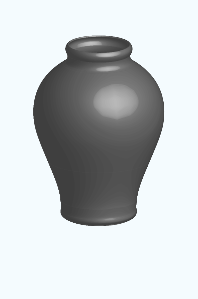
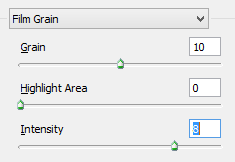
The vase is completed, now you have to apply a concrete texture on. You can download to give real touch, open a new document with same size as document. Draw a Rectangle shape with size as vase, go to Filter menu > Artistic > Film Grain and apply same values as given below.
Now insert concrete texture on main document, select vase and make duplicate on same place by hold Ctrl and press C, F key. Put texture on the vase as covered, make both selection and apply "Mask" in the "Transparency" panel then change blend mode.
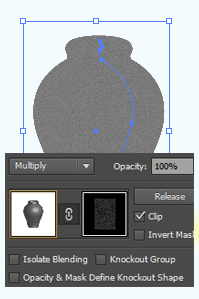
In this step you have to apply a gradient shade on, make duplicate vase on same place as done up. Go to Object menu and choose "Expand appearance" then ""Expand". Go to Gradient panel (Ctrl + F9) and apply color adjustment with angle.
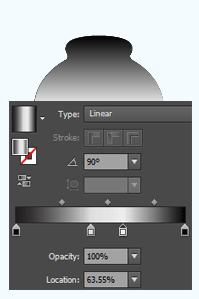
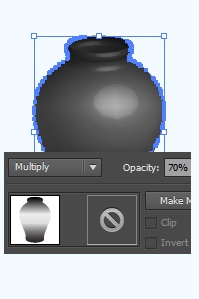
Still selected gradient vase shape go to "Tranceparency Panel" and change blend mode "Normal" to "Multiply" then reduce opacity 70%.
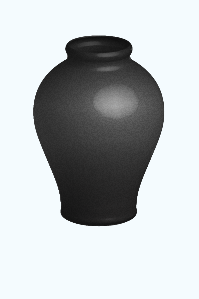
This is the final result.
Santosh Kumar
This is santosh kumar living in New Delhi (India) and love to work as a Web & Graphic Designing. I like to create sketch, background, illustration and vector graphics. Tutorialbunch.com is a very good place where I express my creativity.
|