|
Candy Cane Text
Today, I am going to teach you how to create a candy cane text effect in Photoshop cs6, it is very interesting and enjoyable to design. You will learn also here to make a pattern and method to apply on different object, let's start.
First I am going to make a candy pattern to apply on the text, take a new document with height="100px" and width="100px", draw red stripe on with different shape and distance as given below picture.

Now make it as pattern, go to "Edit Menu" and choose "Define Pattern" then give it a name. Take a new document with any size as you need then go to "Edit Menu" and choose fill, a pop up will come on the screen and apply your pattern, press Ctrl + T key and rotate as 45o.
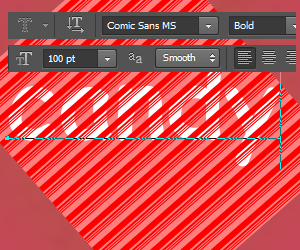
Select Horizontal Type mask tool (T key) and make settings as you like then type on the canvas, click on V key. Now make inverse selection by hold key "Shift + Ctrl" and "I" key then press Del key. You should have a text with candy texture.
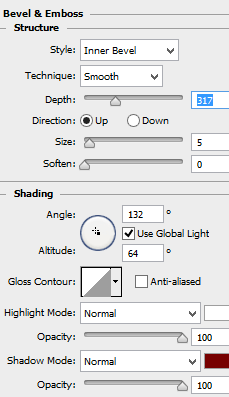
Now make it as bevel shape, go to Layer menu > Layer style > Bevel & Emboss. Change the color and make another setting as done below picture.
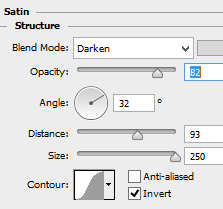
It is looking so white and I am going to apply some fadeness, go to Layer menu > Layer style > Satin. Change the color with another setting as here.
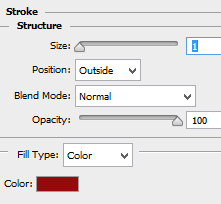
Apply stroke around the text, go to Layer menu > Layer style > Stroke. Choose color and change the size with another setting.
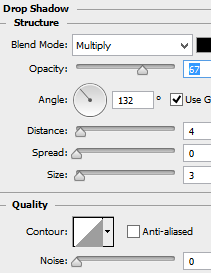
Now finally apply drop shadow, go to Layer menu > Layer style > Drop Shadow. Select black color and make another setting.
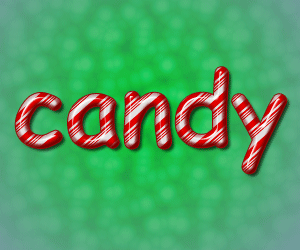
This is the final result.
Santosh Kumar
This is santosh kumar living in New Delhi (India) and love to work as a Web & Graphic Designing. I like to create sketch, background, illustration and vector graphics. Tutorialbunch.com is a very good place where I express my creativity.
|