|
Human Eyeball Graphic
Hi friends
We are here with a new and interesting tutorial that is eyeball graphic effect, It has been
done with the help of simple technique. You can also create a human blue eye iris and learn the technique because I
have described step by step the technique in this example, hope you like and
enjoy.
Take a new document with size "Width='10'" and
"height='41'" but make sure the document should be transparent, draw a
line shape by the Pen Tool (P key) with black color as given here.

Convert the shape as brush go to Edit menu and choose "Define Brush
Preset" then give any name. Press F5 to adjust the setting, In the Brush
Tip Shape choose your defined brush and make adjustment as done below picture.
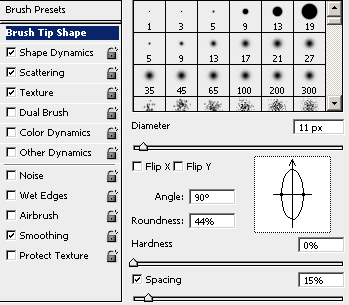
Still brush window select another option "Shape Dynamics" and make
all the adjustment as done here.
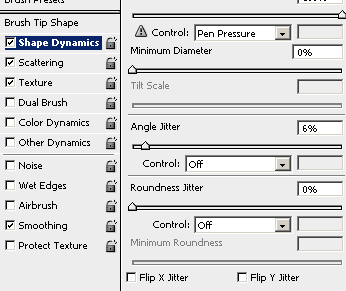
Finally select "Texture" option and make all the adjustment then
choose pattern as done below.
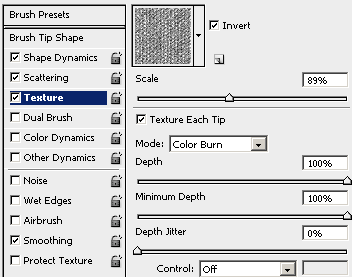
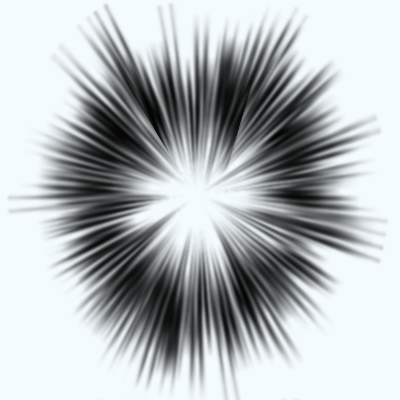
Now take a new document with any size as you need, draw a line by the brush
in the new layer then apply Polar Coordination by following this path (Filter
menu > Distort > Polar Coordination) as done here.
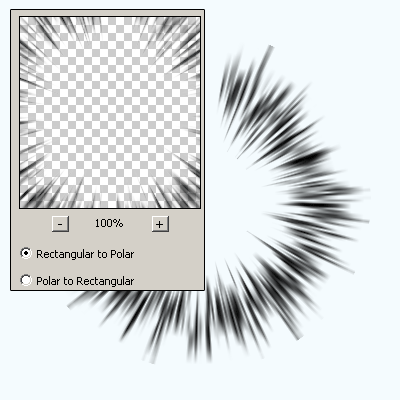
Select Polygonal Lasso Tool (L key) and make selection a part of the effect
then make copy and paste to complete effect like a circle. Select both layer
with shift key and right click then choose merge layer and change the blending
mode "Normal" to "Overlay", make duplicate layer and change
the blending mode "Normal" to "Soft Light".
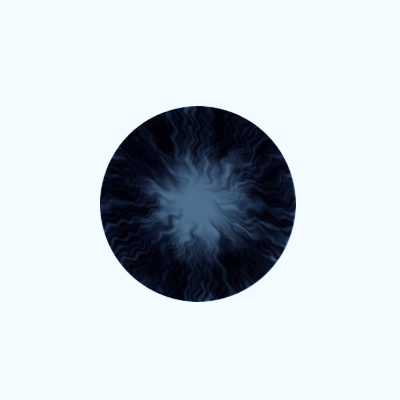
Apply ripple effect by following this path (Filter menu > Distort >
Ripple), set value "100" and choose size "Medium". Draw a circle in the middle of the effect with any color but make sure the
circle layer should be below of the effect in the layer palette, hold Ctrl +
mouse click on the circle layer Thumb to make circle selection and press
Ctrl + Shift + I key then delete the selection part.
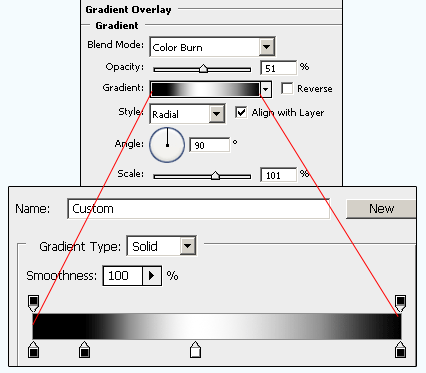
Still selection layer apply gradient color by following this path (Layer menu
> Layer Style > Gradient Overlay), select colors and make all the
adjustment as done below.
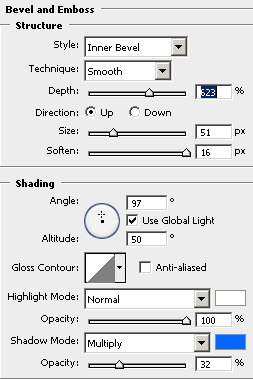
Now apply bevel effect to the eyeball by following this path (Layer menu > Layer
Style > Bevel and Emboss), select color and make all the adjustment as given
below picture.
Now draw a black circle in the middle of the eyeball and apply blur effect by
following this path (Filter menu > Blur > Gaussian Blur), set radius
"2.4" and make duplicate layer then draw little circle on the black
circle with "White" color as given below.
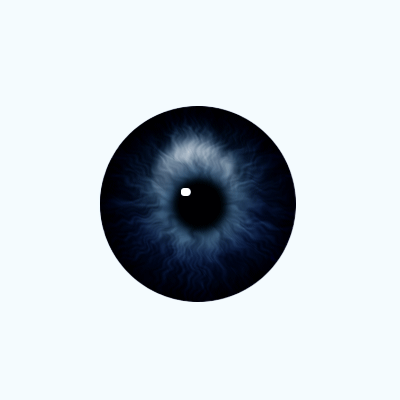
It is time to apply shine of the eyeball, hold Ctrl and mouse click on the
eyeball thumb to make selection. Fill "White" color in the new layer
and change the blending mode "Normal" to "Soft Light" then
make duplicate layer by pressing Ctrl + J key that will be the final result.
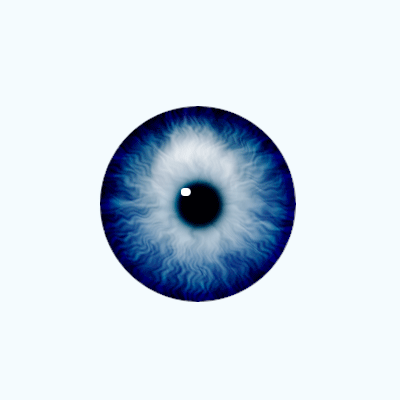
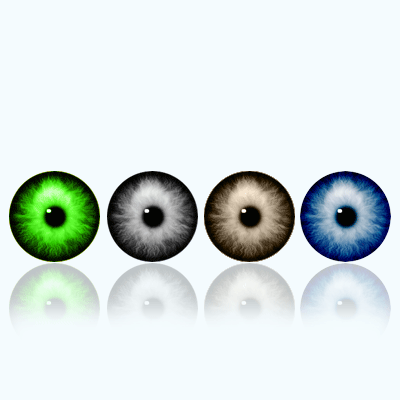
Reduce the size and draw some another with different color, use it and enjoy.
Santosh Kumar
This is santosh kumar living in New Delhi (India) and love to work as a Web & Graphic Designing. I like to create sketch, background, illustration and vector graphics. Tutorialbunch.com is a very good place where I express my creativity.
|