|
Golf Ball
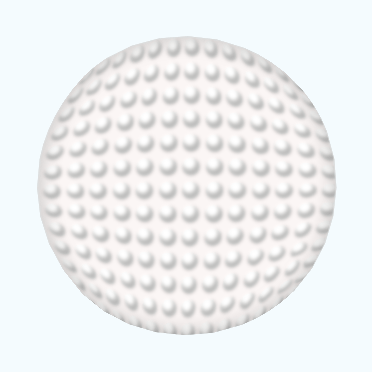
In this tutorial; I am going to create a white golf ball in photoshop cs6. I have used some tools, filter, style and mention all the step as I used to draw it below. You have to follow all of them and create yourself.
Start this example with a new file, the file size should be
width '47', height '24' with '#dad6d6' color

Now choose Ellipse tool (U key) and draw a circle on the
file with 'White' color as looking here.

Use inner shadow effect to the circle, go to layer menu >
layer style > choose inner shadow and adjust all the settings as given here.
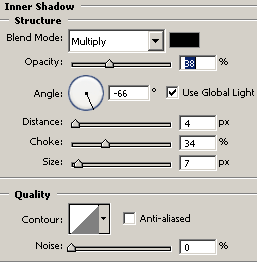
Now I am using blur effect to the circle, go to Filter menu
> Blur > choose Gaussian blur and adjust radius setting.

You have to make two circle shape so make duplicate layer
and adjust the position both circle shapes as I have done here.

Now make whole file as a pattern so go to Edit Menu >
choose Define Pattern option to make pattern then take big size of file as you
required to draw a golf ball. After taking a file go Edit menu > choose Fill
option and select pattern as given below.
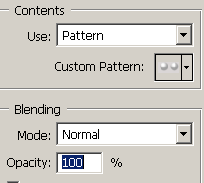
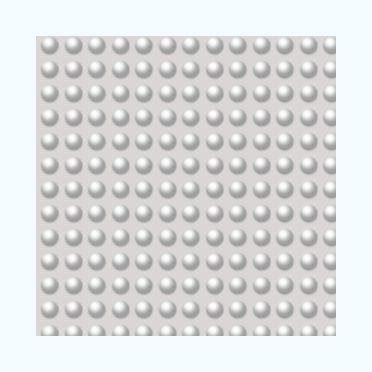 . .
Now you have upper file, Press Ctrl + T key and write click
on the selection then choose 'Warp' option to modify the size of the selection.
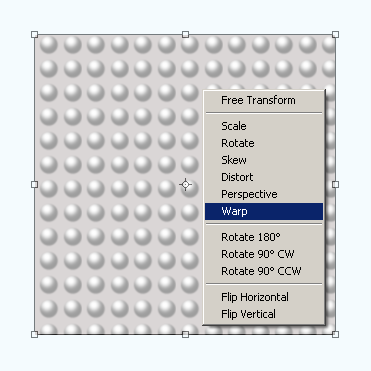
After selection 'Warp' option adjust all the anchor point
like a circle, it is tuff to that but not impossible so try as I have done here.
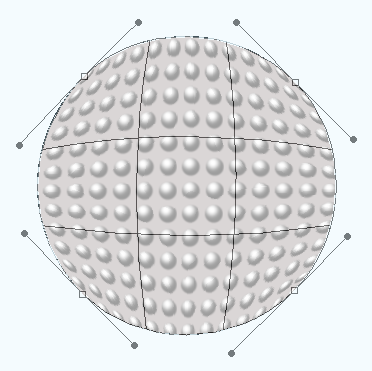
This is golf ball.
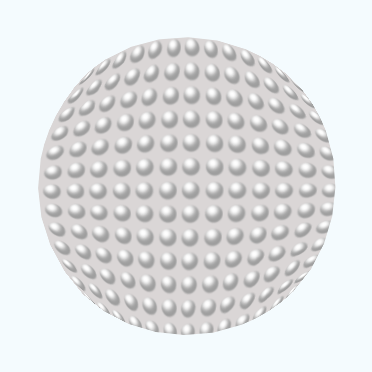
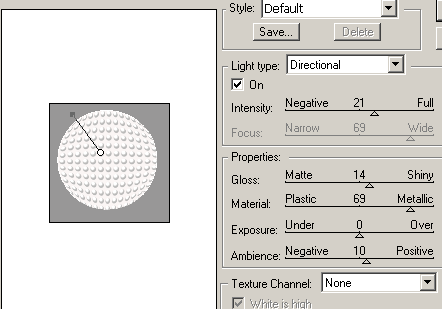
lets go give some lighting effect on the ball, go to Filter
menu > Render > choose lighting effect and adjust all the settings as
here.
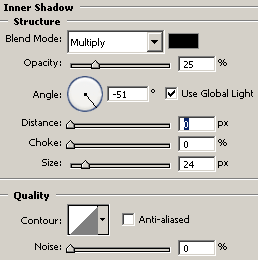
Add some inner shadow to the golf ball, go to layer
menu > layer style > choose inner shadow and adjust all the settings.
Make duplicate layer and go to Filter menu > Blur >
Gaussian Blur and set radius '1.0' then change blending mode 'Normal' to ''Luminosity'.
This is your golf ball is completed
Santosh Kumar
This is santosh kumar living in New Delhi (India) and love to work as a Web & Graphic Designing. I like to create sketch, background, illustration and vector graphics. Tutorialbunch.com is a very good place where I express my creativity.
|