|
Stylish Document Folder
Hi Friends
We have drown a stylish black document folder for the use in the mobile
application, you can also use it another purpose. We have described the process
to create it easily by the simple steps, every step is important so please don't
miss any one of them.
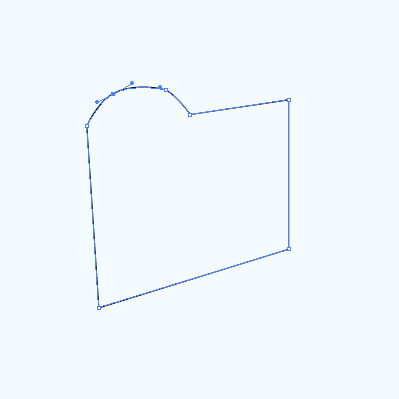
First take a new document with any size as you required, We have taken
Width=400, Height=400. Now select Pen Tool (P key) and create some anchor point to
complete shape without fill color to look clear path as below picture.
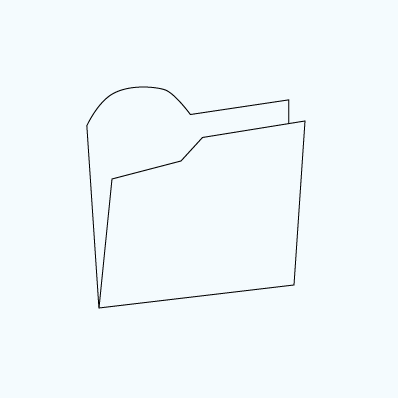
Again draw another shape by the Pen Tool (P key) and adjust the position both
shape by the Move Tool (V key) to look like joint.
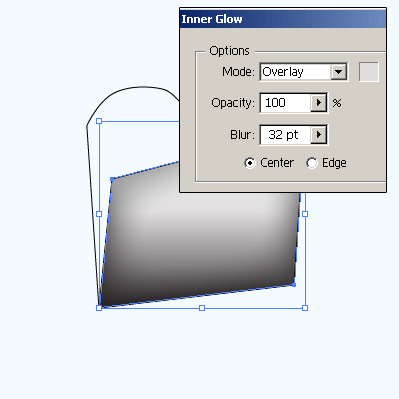
Now you have to work on the front shape to make it attractive and we are
going to apply gradient color. Open gradient panel (Ctrl + F9) and select right
gradient slider then choose "#000000", in the left gradient slider
choose "#d1d2d3" color.

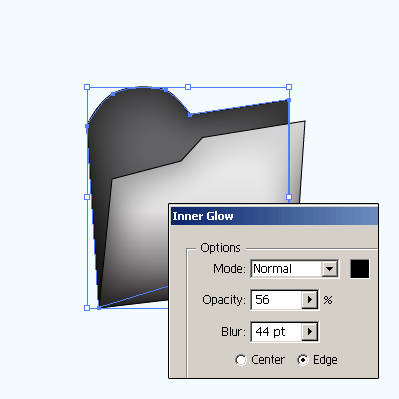
After done gradient color apply Inner Glow to give a emboss look to the
shape, follow this path (Effect menu > Stylize > Inner Glow) and choose
the color "#e0dfde" then adjust another settings as done below
picture.
Now come to back shape of the folder, select back shape and apply gradient
color. Open Gradient Panel (Ctrl + F9) and apply black color in the right slider
then apply "#656466" color in the left slider.
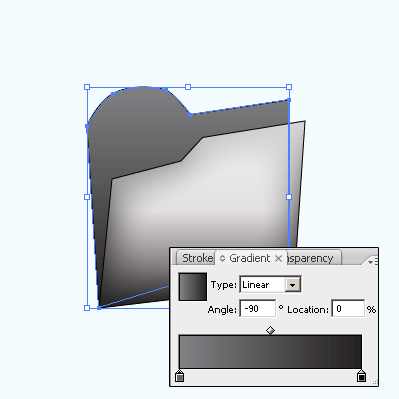
Still selected shape apply a different inner glow in, follow this path
(Effect menu > Stylize > Inner Glow) and choose black color then adjust
all the settings as done below picture.
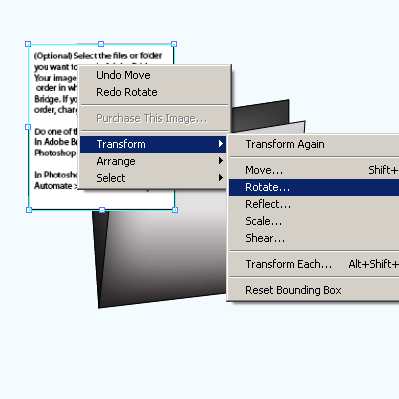
Your folder is completed and now you have to put some paper inside the
folder, follow this path (File menu > Place) and import a paper picture then
adjust angle and size according to space in the folder. We have a paper and
right click > Transform > Rotate 90o.
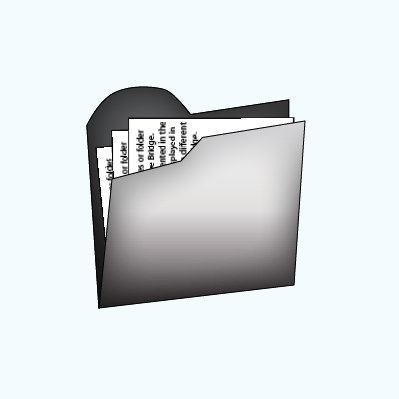
Now put paper inside the folder, select paper picture and press (Ctrl + [ ) one
time to send it back of the front shape. Make two more duplicate picture and
adjust them to make it full.
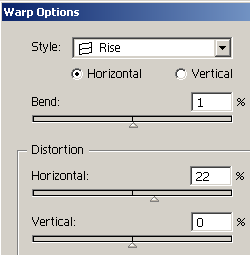
It is final step and you have to make shadow of the folder, select all the
shape and group them by pressing (Ctrl + G) and make copy (Ctrl + C) then paste
on the front (Ctrl + F). Now pull down and apply Warp Option by following this
path (Effect menu > Warp > Rise) then apply settings and reduce the
opacity "100 %" to "20%" in the Transparency Panel (Shift +
Ctrl + F10).
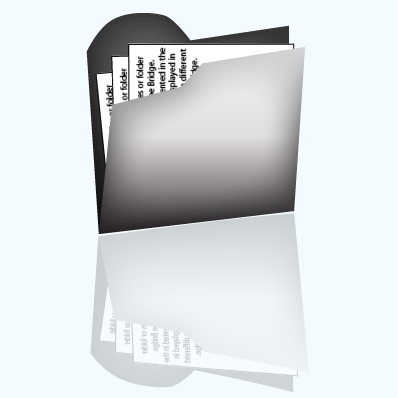
The final Document Folder is here.
Santosh Kumar
This is santosh kumar living in New Delhi (India) and love to work as a Web & Graphic Designing. I like to create sketch, background, illustration and vector graphics. Tutorialbunch.com is a very good place where I express my creativity.
|